> ## Documentation Index
> Fetch the complete documentation index at: https://aletyx.ai/docs/llms.txt
> Use this file to discover all available pages before exploring further.
# Executable Processes Models: BPMN in Aletyx Playground
> A hands-on walkthrough of exploring, modeling, testing, and deploying BPMN process models in the browser-based Aletyx Playground.
export const AnnotatedImage = ({src, alt, markers = []}) =>

{markers.map((m, i) =>
{i + 1}
)}
;
Business Process Model and Notation (BPMN) is a standardized graphical notation for
business process modeling. Aletyx Playground provides a powerful environment for
creating, editing, and executing BPMN models. This getting started guide will walk
you through exploring and understanding a sample hiring process, identifying key
BPMN components, and deploying your process to different environments.
This guide uses the Aletyx Enterprise Build of Kogito and Drools.
## Accessing Aletyx Playground
Aletyx Playground is available in two formats: a free-to-use cloud option and your
own containerized option.
Navigate to [playground.aletyx.ai](https://playground.aletyx.ai). No
installation required — just start playing immediately!
As long as you have set up your local environment to meet the Local Environment
Requirements, you can run one of these commands to get everything deployed
locally:
```bash macOS theme={null}
curl -sL https://raw.githubusercontent.com/aletyx-labs/kie-10.0.0-sandbox/refs/heads/main/docker-compose.yaml | docker compose -f - up
```
```bash Linux theme={null}
curl -sL https://raw.githubusercontent.com/aletyx-labs/kie-10.0.0-sandbox/refs/heads/main/docker-compose.yaml | docker-compose -f - up
```
```bash Windows theme={null}
curl -sL https://raw.githubusercontent.com/aletyx-labs/kie-10.0.0-sandbox/refs/heads/main/docker-compose.yaml | docker-compose -f - up
```
Then access Aletyx Playground at [http://localhost:9090](http://localhost:9090).
## The Aletyx Playground Interface
When you access Aletyx Playground, you'll see a welcome screen with several key areas:
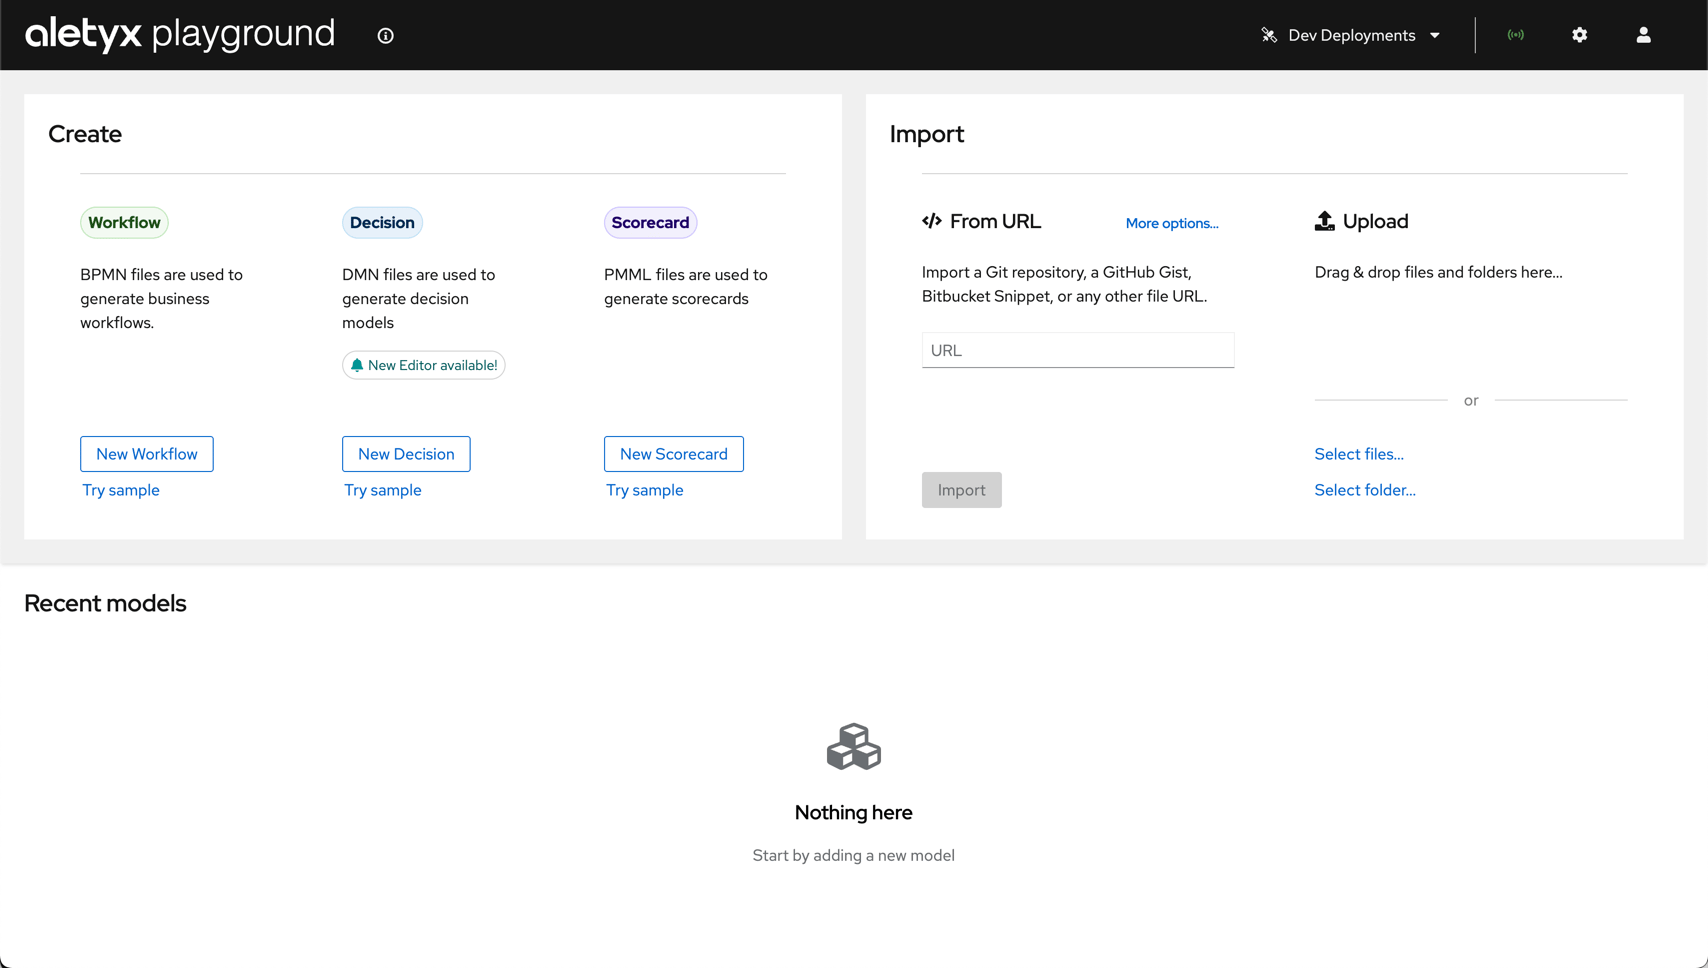 The top tiles allow you to create new projects or import existing ones.
Import existing projects or DMN/BPMN files either from various Git providers or
through direct file uploads.
The lower section displays your locally imported projects and models.
The top bar provides access to:
* **Dev Deployments**: Test deployments to connected Kubernetes or OpenShift clusters
* **Extended Services**: Connection to the DMN execution service for testing
* **Settings** (⚙️): Configure your Playground instance, including DMN version settings
* **Profile** (👤): Configure connections to Git providers and Kubernetes environments
## Exploring the Sample Hiring Process
Let's examine a sample hiring process BPMN model that demonstrates various workflow
patterns. It gives us a basis for understanding what the Aletyx Enterprise Build of
Kogito and Drools offers for process design and, later, process management.
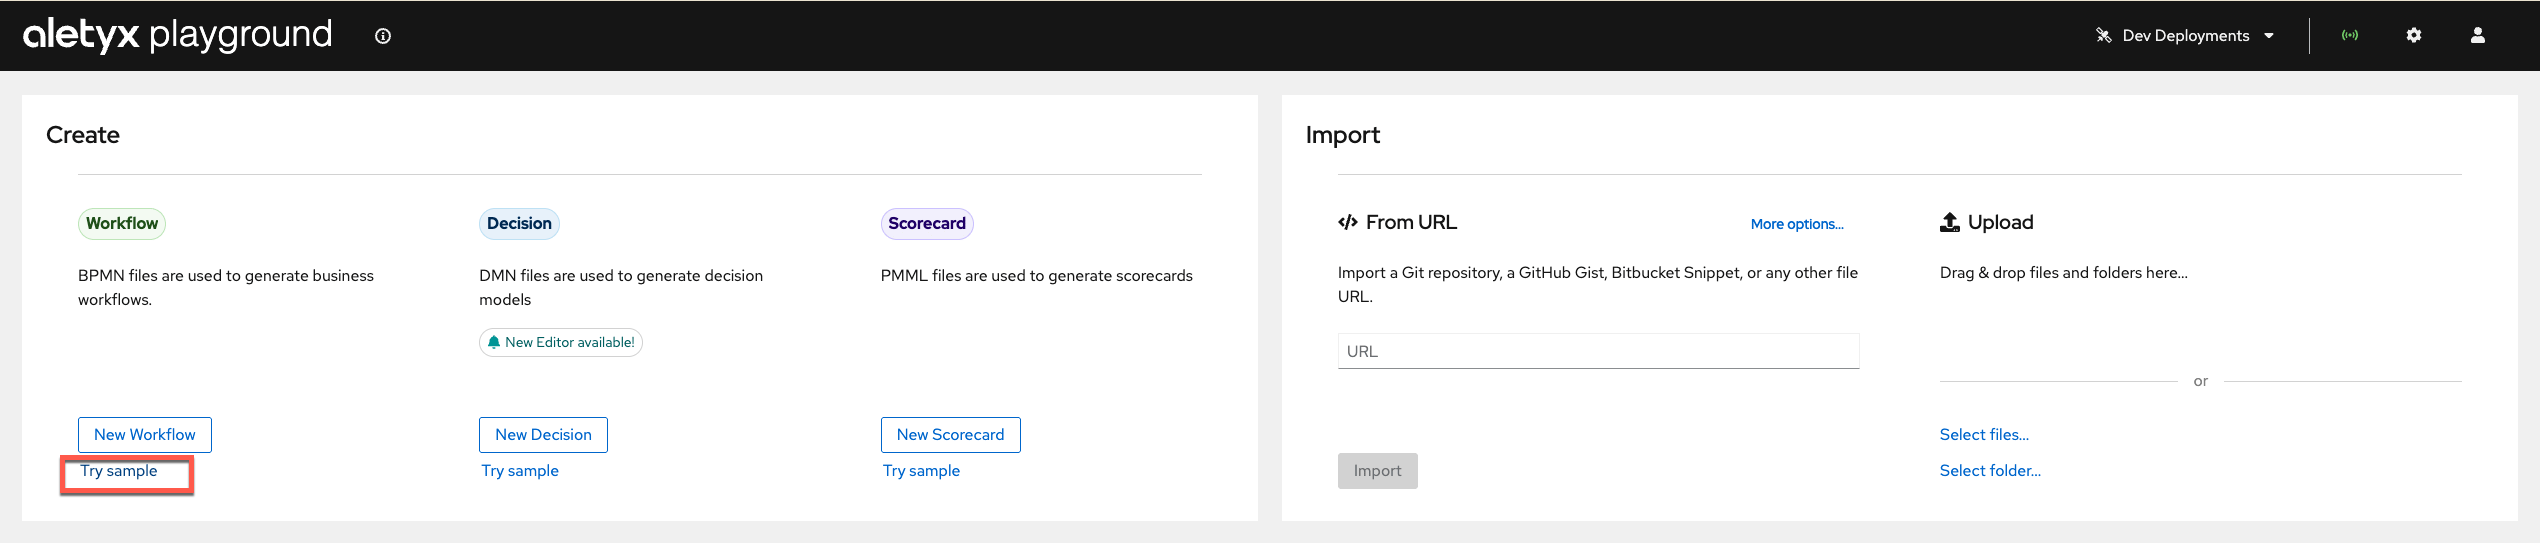
From the welcome screen, click **Try Sample** under the Process section of the
Aletyx Playground Create area to start seeing the basics of a BPMN workflow.
The top tiles allow you to create new projects or import existing ones.
Import existing projects or DMN/BPMN files either from various Git providers or
through direct file uploads.
The lower section displays your locally imported projects and models.
The top bar provides access to:
* **Dev Deployments**: Test deployments to connected Kubernetes or OpenShift clusters
* **Extended Services**: Connection to the DMN execution service for testing
* **Settings** (⚙️): Configure your Playground instance, including DMN version settings
* **Profile** (👤): Configure connections to Git providers and Kubernetes environments
## Exploring the Sample Hiring Process
Let's examine a sample hiring process BPMN model that demonstrates various workflow
patterns. It gives us a basis for understanding what the Aletyx Enterprise Build of
Kogito and Drools offers for process design and, later, process management.
From the welcome screen, click **Try Sample** under the Process section of the
Aletyx Playground Create area to start seeing the basics of a BPMN workflow.
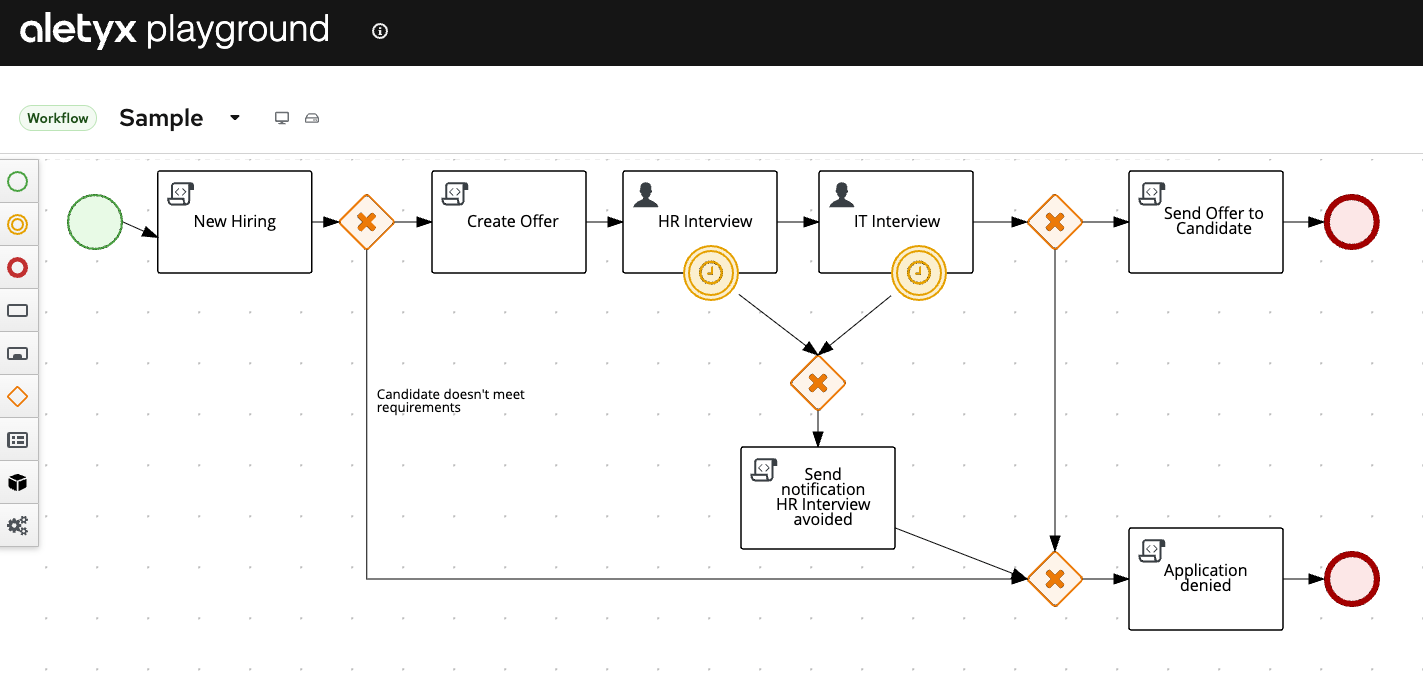
 The hiring process BPMN model will open in the editor.
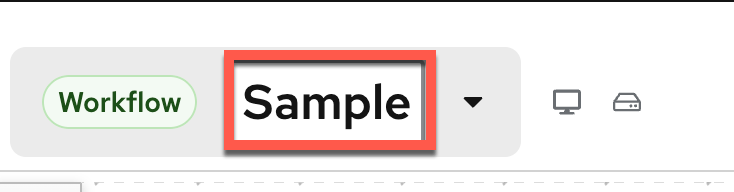
 If you click the name **Sample** on the top of the editor, you can change the
name. As a best practice, this typically matches the process identification behind
the `processID` for the BPMN model. For this change, we'll shift it from **Sample**
to **hiring**.
If you click the name **Sample** on the top of the editor, you can change the
name. As a best practice, this typically matches the process identification behind
the `processID` for the BPMN model. For this change, we'll shift it from **Sample**
to **hiring**.
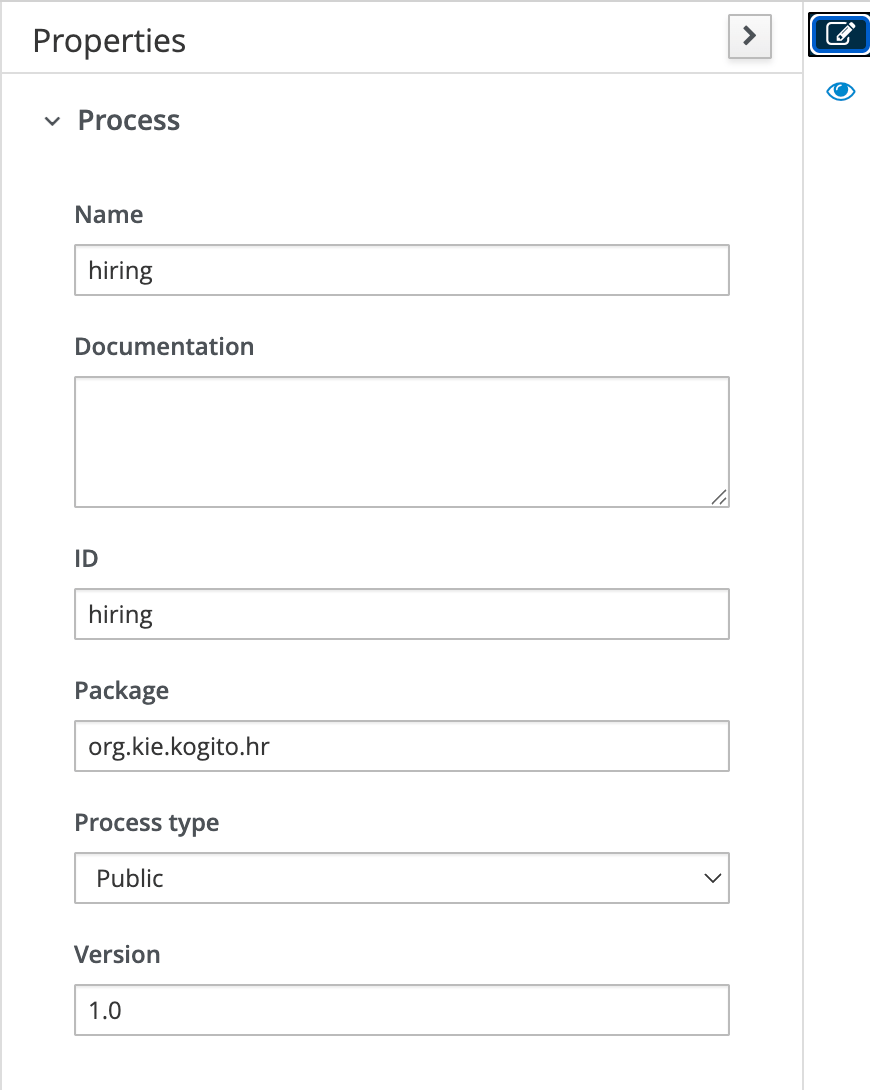
 The properties of the diagram will be explored in more detail later, but to
understand the process ID and name, you can get a preview of the panel here.
The properties of the diagram will be explored in more detail later, but to
understand the process ID and name, you can get a preview of the panel here.
 ### Understanding the Hiring Process Flow
This hiring process demonstrates a complete hiring workflow with multiple branches:
* **Start**: The process begins with a "New Hiring" event that initializes the candidate evaluation.
* **Decision Gateway**: Evaluates if the candidate meets minimum requirements.
* **Offer Creation**: If qualified, an offer is created with salary and bonus calculations.
* **Parallel Interviews**: HR and IT interviews proceed in parallel.
* **Interview Timeouts**: Both interviews have timer events (180-second timeouts).
* **Hiring Decision Gateway**: Based on approvals from both departments.
* **Final Steps**: Either sending an offer or application denial.
Let's explore each piece in the diagram!
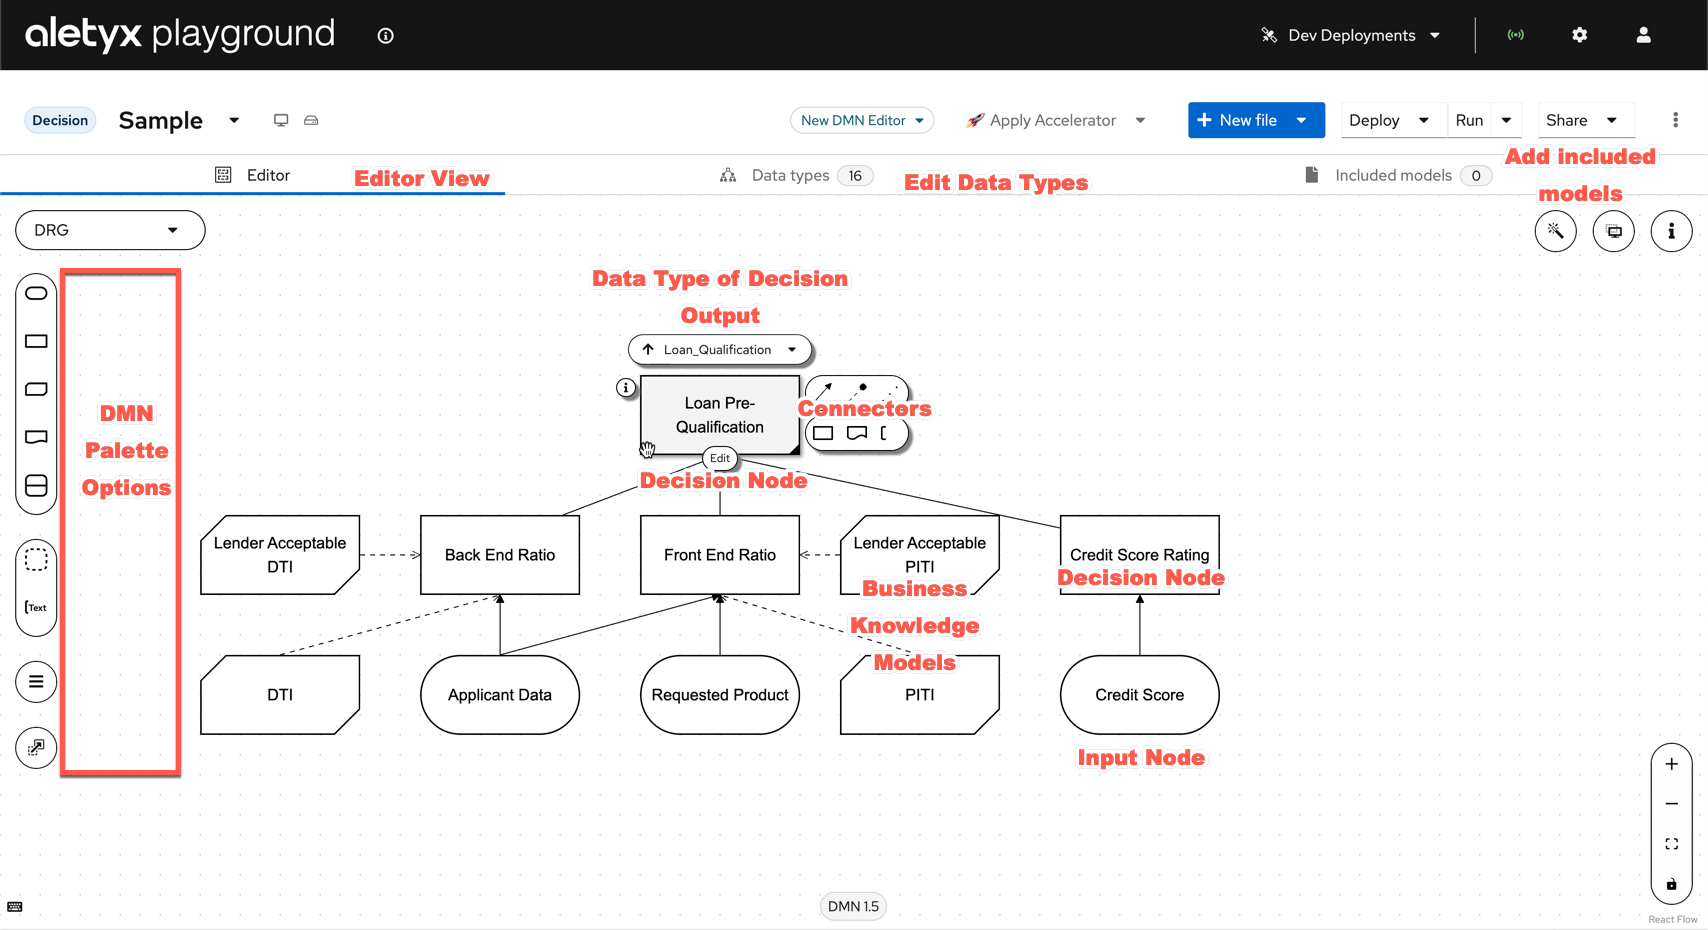
Hover over each numbered marker on the screenshot to see what that part does, or
expand the list below.
**Top bar and controls**
1. **Apply Accelerator** — Creates a pre-scaffolded project from standards attached to referenced projects, so you can build from model to deployment efficiently using templates. See the [Accelerators Reference](https://docs.aletyx.ai/components/playground/accelerators).
2. **New File button** — Create new Workflow (.bpmn), Decision (.dmn), or (.pmml) files within the current project folder, or upload other files from your workstation. Applying an accelerator brings in all the files associated with the workspace.
3. **Deploy** (Dev Deployment) — Trigger a Dev Deployment to try out a service. It's not a replacement for a full deployment, but an excellent quick testing tool. See the [Dev Deployment Reference](https://docs.aletyx.ai/components/playground/dev-deployment).
4. **Share** — Synchronize your project with a Git provider using your credentials, or download the BPMN/DMN file in XML format to use elsewhere. See [Git Configuration](https://docs.aletyx.ai/getting-started/git-configuration).
5. **Properties of selected item** (pen-and-paper icon, top-right) — Opens the selected node's properties.
**Diagram nodes and connectors**
6. **Start node** (green circle) — The entry point of the process. Can be a generic start (as shown here) or triggered from timers, signals, or events (like a Kafka event). See the [Start Events Reference](https://docs.aletyx.ai/core/processes/basic-bpmn/start-events).
7. **New Hiring script task** — Runs a script; here it initializes process variables. Opening its properties shows things like `kcontext.setVariable("hr_approval", false)`.
8. **Gateway — split** (diamond with ✕) — A point where the process can branch. Here it's an exclusive gateway: if the candidate meets the requirements the process moves forward, otherwise the application is denied. See the [Gateway Reference](https://docs.aletyx.ai/core/processes/basic-bpmn/gateways).
9. **Gateway branch** (the conditional label on a flow, e.g. "Candidate doesn't meet requirements") — The condition a branch follows, typically in DRL syntax (MVEL or Java). See the [Gateway Reference](https://docs.aletyx.ai/core/processes/basic-bpmn/gateways).
10. **Create Offer script task** — Another script task, here building a base offer from the application details so interviewers can review what would be offered.
11. **Human task** (e.g. "HR Interview") — A task delegated to a person to work on. See the [Human Task Reference](https://docs.aletyx.ai/core/processes/basic-bpmn/activities/#user-task).
12. **Boundary timer event** (clock attached to a task) — Set on tasks (and other services) to escalate, cancel, or create new pathways. Uses the ISO-8601 time standard. See [Intermediate Events](https://docs.aletyx.ai/core/processes/basic-bpmn/intermediate-events) and the [ISO-8601 Reference](https://docs.aletyx.ai/core/processes/advanced-bpmn/iso-8601-guide).
13. **Gateway — join** (diamond with ✕) — A point where multiple branches of a process come back together. See the [Gateway Reference](https://docs.aletyx.ai/core/processes/basic-bpmn/gateways).
14. **End node** (red circle) — Where the process concludes when it reaches this point. See the [End Events Reference](https://docs.aletyx.ai/core/processes/basic-bpmn/end-events).
**Left palette** (drag elements onto the canvas)
15. **Start nodes** — Palette items for the various start nodes: generic, or triggered from timers, signals, or events. See the [Start Events Reference](https://docs.aletyx.ai/core/processes/basic-bpmn/start-events).
16. **Catching and throwing nodes** — Create catching and throwing events: compensation events, messages, signals, etc.
17. **End nodes** — Palette items for the various end nodes. See the [End Events Reference](https://docs.aletyx.ai/core/processes/basic-bpmn/end-events).
18. **Activities** — Create the activities in the process: User tasks, Business Rules tasks, Script tasks, and Service tasks. See the [BPMN Activities Reference](https://docs.aletyx.ai/core/processes/basic-bpmn/activities).
19. **Subprocesses** — The various types of subprocesses you can use within a process. See the [Subprocesses Reference](https://docs.aletyx.ai/core/processes/basic-bpmn/subprocesses).
20. **Gateways** — The different gateways a process can use. See the [Gateway Reference](https://docs.aletyx.ai/core/processes/basic-bpmn/gateways).
21. **Containers** — Group tasks belonging to a user/group by swimlane.
22. **Artifacts** — Annotations that describe or group your model; they have no executable impact.
23. **Custom tasks** — Use custom tasks within the editor, typically tied to custom work item handlers.
### Understanding the Hiring Process Flow
This hiring process demonstrates a complete hiring workflow with multiple branches:
* **Start**: The process begins with a "New Hiring" event that initializes the candidate evaluation.
* **Decision Gateway**: Evaluates if the candidate meets minimum requirements.
* **Offer Creation**: If qualified, an offer is created with salary and bonus calculations.
* **Parallel Interviews**: HR and IT interviews proceed in parallel.
* **Interview Timeouts**: Both interviews have timer events (180-second timeouts).
* **Hiring Decision Gateway**: Based on approvals from both departments.
* **Final Steps**: Either sending an offer or application denial.
Let's explore each piece in the diagram!
Hover over each numbered marker on the screenshot to see what that part does, or
expand the list below.
**Top bar and controls**
1. **Apply Accelerator** — Creates a pre-scaffolded project from standards attached to referenced projects, so you can build from model to deployment efficiently using templates. See the [Accelerators Reference](https://docs.aletyx.ai/components/playground/accelerators).
2. **New File button** — Create new Workflow (.bpmn), Decision (.dmn), or (.pmml) files within the current project folder, or upload other files from your workstation. Applying an accelerator brings in all the files associated with the workspace.
3. **Deploy** (Dev Deployment) — Trigger a Dev Deployment to try out a service. It's not a replacement for a full deployment, but an excellent quick testing tool. See the [Dev Deployment Reference](https://docs.aletyx.ai/components/playground/dev-deployment).
4. **Share** — Synchronize your project with a Git provider using your credentials, or download the BPMN/DMN file in XML format to use elsewhere. See [Git Configuration](https://docs.aletyx.ai/getting-started/git-configuration).
5. **Properties of selected item** (pen-and-paper icon, top-right) — Opens the selected node's properties.
**Diagram nodes and connectors**
6. **Start node** (green circle) — The entry point of the process. Can be a generic start (as shown here) or triggered from timers, signals, or events (like a Kafka event). See the [Start Events Reference](https://docs.aletyx.ai/core/processes/basic-bpmn/start-events).
7. **New Hiring script task** — Runs a script; here it initializes process variables. Opening its properties shows things like `kcontext.setVariable("hr_approval", false)`.
8. **Gateway — split** (diamond with ✕) — A point where the process can branch. Here it's an exclusive gateway: if the candidate meets the requirements the process moves forward, otherwise the application is denied. See the [Gateway Reference](https://docs.aletyx.ai/core/processes/basic-bpmn/gateways).
9. **Gateway branch** (the conditional label on a flow, e.g. "Candidate doesn't meet requirements") — The condition a branch follows, typically in DRL syntax (MVEL or Java). See the [Gateway Reference](https://docs.aletyx.ai/core/processes/basic-bpmn/gateways).
10. **Create Offer script task** — Another script task, here building a base offer from the application details so interviewers can review what would be offered.
11. **Human task** (e.g. "HR Interview") — A task delegated to a person to work on. See the [Human Task Reference](https://docs.aletyx.ai/core/processes/basic-bpmn/activities/#user-task).
12. **Boundary timer event** (clock attached to a task) — Set on tasks (and other services) to escalate, cancel, or create new pathways. Uses the ISO-8601 time standard. See [Intermediate Events](https://docs.aletyx.ai/core/processes/basic-bpmn/intermediate-events) and the [ISO-8601 Reference](https://docs.aletyx.ai/core/processes/advanced-bpmn/iso-8601-guide).
13. **Gateway — join** (diamond with ✕) — A point where multiple branches of a process come back together. See the [Gateway Reference](https://docs.aletyx.ai/core/processes/basic-bpmn/gateways).
14. **End node** (red circle) — Where the process concludes when it reaches this point. See the [End Events Reference](https://docs.aletyx.ai/core/processes/basic-bpmn/end-events).
**Left palette** (drag elements onto the canvas)
15. **Start nodes** — Palette items for the various start nodes: generic, or triggered from timers, signals, or events. See the [Start Events Reference](https://docs.aletyx.ai/core/processes/basic-bpmn/start-events).
16. **Catching and throwing nodes** — Create catching and throwing events: compensation events, messages, signals, etc.
17. **End nodes** — Palette items for the various end nodes. See the [End Events Reference](https://docs.aletyx.ai/core/processes/basic-bpmn/end-events).
18. **Activities** — Create the activities in the process: User tasks, Business Rules tasks, Script tasks, and Service tasks. See the [BPMN Activities Reference](https://docs.aletyx.ai/core/processes/basic-bpmn/activities).
19. **Subprocesses** — The various types of subprocesses you can use within a process. See the [Subprocesses Reference](https://docs.aletyx.ai/core/processes/basic-bpmn/subprocesses).
20. **Gateways** — The different gateways a process can use. See the [Gateway Reference](https://docs.aletyx.ai/core/processes/basic-bpmn/gateways).
21. **Containers** — Group tasks belonging to a user/group by swimlane.
22. **Artifacts** — Annotations that describe or group your model; they have no executable impact.
23. **Custom tasks** — Use custom tasks within the editor, typically tied to custom work item handlers.
 ### Key BPMN Components
#### 1. Events
Events represent significant occurrences in a process. In our hiring process, we have:
* **Start Event**: Marks the beginning of the process
* **End Events**: Marks process completion
* **Boundary Timer Events**: The clock symbols attached to interview tasks that trigger after 180 seconds
#### 2. Activities
Activities represent work performed in the process:
* **Script Tasks**: "New Hiring", "Create Offer", "Send notification HR Interview avoided", etc.
* **User Tasks**: "HR Interview" and "IT Interview" requiring human interaction
* **Service Tasks**: Automated tasks that execute system services (not in this example)
#### 3. Gateways
Gateways control the flow of the process:
* **Exclusive Gateways** (Diamond with X): Decision points like "Candidate meets requirements?"
* **Parallel Gateways**: Points where the process splits into parallel paths (not explicitly shown but parallel flow exists)
* **Inclusive Gateways**: Points where some paths are taken based on conditions (not in this example)
#### 4. Sequence Flows
The arrows connecting the elements represent the sequence of execution:
* **Normal Flow**: Standard progression path
* **Conditional Flow**: Follows specific conditions (e.g., "Candidate doesn't meet requirements")
* **Default Flow**: Followed when no other conditions are met
#### 5. Data Objects
Data that flows through the process:
* **Process Variables**: `candidate`, `experience`, `skills`, `category`, `salary`
* **Input/Output Mappings**: Data passed between tasks
## Working with the BPMN Editor
### Understanding the Editor Interface
* **Left Palette**: Contains BPMN elements you can drag onto the modeller
* **Modeller**: The main editing area where you build your process
* **Properties Panel**: Right-side panel for configuring selected elements
* **Top Menu**: Tools for saving, deploying, and validating your model
### Exploring Element Properties
Let's examine the properties of key elements.
1. Click on the "HR Interview" task to select it.
2. Open the properties panel (right side).
3. Observe:
* **General**: Name, ID, Documentation
* **Implementation**: User task details
* **Data Assignments**: Input/Output mappings
* **Actors**: Who can perform this task ("jdoe")
1. Click on the gateway after "Create Offer".
2. The properties panel shows:
* Gateway type
* Default flow
* Outgoing conditions
1. Click on the "Create Offer" script task.
2. Examine the script content calculating salary and bonus:
```java theme={null}
// Example script from "Create Offer" task
if (experience <= 5) {
salary = 30000;
category = "Software Engineer";
} else if (experience <= 10) {
salary = 40000;
category = "Senior Software Engineer";
} else {
salary = 50000;
category = "Software Architect";
}
bonus = skills.split(",").length * 150;
kcontext.setVariable("category", category);
kcontext.setVariable("salary", salary);
kcontext.setVariable("bonus", bonus);
```
## Modifying the Process
Let's make some modifications to understand the editor better.
### Adding a New Task
1. From the left palette, drag a "User Task" onto the modeller after "Create Offer".
2. Connect it to the flow:
* Click on the sequence flow between "Create Offer" and "HR Interview".
* Delete it by pressing Delete/Backspace.
* Use the arrow tool to connect "Create Offer" to your new task.
* Connect your new task to "HR Interview".
3. Configure the task:
* Name it "Manager Approval".
* Set the actor to "manager".
* Add data inputs/outputs as needed.
### Adding a Condition to a Gateway
1. Click on the exclusive gateway after "New Hiring".
2. In the properties panel, select a sequence flow to edit.
3. Add a condition like: `return experience >= 2;`
### Adding a Service Task
1. Drag a "Service Task" from the palette to the modeller.
2. Configure it with:
* **Name**: "Background Check"
* **Implementation**: Select "Java" implementation type
* **Class name**: `org.acme.hiring.BackgroundCheckService`
* **Method**: `performCheck`
## Process Variables and Data Flow
The hiring process uses several variables:
* **Input Variables**:
* `candidate` (String): Candidate's name
* `experience` (Integer): Years of experience
* `skills` (String): Comma-separated list of skills
* **Process Variables**:
* `hr_approval` (Boolean): HR interview approval
* `it_approval` (Boolean): IT interview approval
* **Output Variables**:
* `category` (String): Job category based on experience
* `salary` (Integer): Base salary calculation
* `bonus` (Integer): Bonus calculation based on skills
### Data Mapping Example
Let's examine how data is passed between tasks:
* **HR Interview Task**:
* Inputs:
* `candidate`: Candidate name
* `approve`: Current approval status (hr\_approval)
* `category`: Job category
* `baseSalary`: Salary amount
* `bonus`: Bonus amount
* Outputs:
* `approve`: Updated approval status (hr\_approval)
* `category`: Potentially modified category
* `baseSalary`: Potentially modified salary
* `bonus`: Potentially modified bonus
## Process Execution and Testing
### Testing Your BPMN Process
1. Click the "Deploy" button in the top-right corner.
2. Select the "Deploy to Dev" option.
3. Once deployed, click "Start Process".
4. Enter test data:
* **Candidate**: "John Doe"
* **Experience**: 8
* **Skills**: "Java,Spring,Drools"
5. Click "Start" to begin the process instance.
6. Navigate to the "Instances" tab to see the running process.
7. Complete user tasks as they appear in the "Tasks" tab.
### Monitoring Process Execution
1. In the "Instances" tab, click on a running instance.
2. View the process diagram with the highlighted current state.
3. Examine the "Variables" tab to see current values.
4. Check the "Logs" tab for execution history.
## Deployment Options
### Local Deployment
For local testing with the Dev Deployment option:
1. Click "Deploy" in the top menu.
2. Select "Deploy to Dev".
3. Access the runtime at [http://localhost:9090/management](http://localhost:9090/management).
### Kubernetes Deployment
For deploying to Kubernetes:
1. Set up Kubernetes configuration:
* Click on the Profile icon (👤).
* Select the "Kubernetes" tab and add your cluster.
2. Deploy to Kubernetes:
* Click "Deploy" in the top menu.
* Select your Kubernetes environment.
* Configure deployment options (replicas, resources).
* Click "Deploy".
## Integrating BPMN with DMN
The hiring process could be enhanced with decision models:
1. Create a DMN model for determining eligibility:
* Click "New File" > "Decision".
* Name it "CandidateEligibility".
* Create a decision table with inputs for experience and skills.
* Connect it to your BPMN model.
2. Integrate the DMN with your BPMN:
* Replace the exclusive gateway condition with a business rule task.
* Configure the task to call your DMN model.
* Map process variables to DMN inputs/outputs.
## Java Application Integration
### Setting Up a Java Project
```xml theme={null}
org.kie
kie-api
10.0.0
```
### Invoking the Process from Java
```java theme={null}
import org.kie.kogito.process.Process;
import org.kie.kogito.process.ProcessInstance;
@Inject
Process hiringProcess;
public void startHiringProcess(String candidate, int experience, String skills) {
HiringModel model = HiringModel.builder()
.candidate(candidate)
.experience(experience)
.skills(skills)
.build();
ProcessInstance instance = hiringProcess.createInstance(model);
instance.start();
}
```
## Next Steps
Now that you're familiar with BPMN in Aletyx Playground, here are some recommended
next steps:
* **Create Custom Service Tasks**: Develop Java components for integration.
* **Use Process Variables**: Define complex data structures.
* **Add Error Handling**: Implement boundary error events and compensation.
* **Create Multi-Instance Tasks**: Handle collections of data in parallel.
* **Build End-to-End Applications**: Combine BPMN with DMN and Java services.
Orchestrate long-running business processes.
Build and test DMN decision models in the browser.
How decisions are authored, tested, and governed.
## Additional Resources
* [BPMN 2.0 Specification](https://www.omg.org/spec/BPMN/2.0/)
* [Aletyx Documentation](https://docs.aletyx.ai/)
* [KIE Apache Projects](https://kie.apache.org/)
* [Drools Documentation](https://www.drools.org/learn/documentation.html)
* [jBPM Documentation](https://www.jbpm.org/learn/documentation.html)
### Key BPMN Components
#### 1. Events
Events represent significant occurrences in a process. In our hiring process, we have:
* **Start Event**: Marks the beginning of the process
* **End Events**: Marks process completion
* **Boundary Timer Events**: The clock symbols attached to interview tasks that trigger after 180 seconds
#### 2. Activities
Activities represent work performed in the process:
* **Script Tasks**: "New Hiring", "Create Offer", "Send notification HR Interview avoided", etc.
* **User Tasks**: "HR Interview" and "IT Interview" requiring human interaction
* **Service Tasks**: Automated tasks that execute system services (not in this example)
#### 3. Gateways
Gateways control the flow of the process:
* **Exclusive Gateways** (Diamond with X): Decision points like "Candidate meets requirements?"
* **Parallel Gateways**: Points where the process splits into parallel paths (not explicitly shown but parallel flow exists)
* **Inclusive Gateways**: Points where some paths are taken based on conditions (not in this example)
#### 4. Sequence Flows
The arrows connecting the elements represent the sequence of execution:
* **Normal Flow**: Standard progression path
* **Conditional Flow**: Follows specific conditions (e.g., "Candidate doesn't meet requirements")
* **Default Flow**: Followed when no other conditions are met
#### 5. Data Objects
Data that flows through the process:
* **Process Variables**: `candidate`, `experience`, `skills`, `category`, `salary`
* **Input/Output Mappings**: Data passed between tasks
## Working with the BPMN Editor
### Understanding the Editor Interface
* **Left Palette**: Contains BPMN elements you can drag onto the modeller
* **Modeller**: The main editing area where you build your process
* **Properties Panel**: Right-side panel for configuring selected elements
* **Top Menu**: Tools for saving, deploying, and validating your model
### Exploring Element Properties
Let's examine the properties of key elements.
1. Click on the "HR Interview" task to select it.
2. Open the properties panel (right side).
3. Observe:
* **General**: Name, ID, Documentation
* **Implementation**: User task details
* **Data Assignments**: Input/Output mappings
* **Actors**: Who can perform this task ("jdoe")
1. Click on the gateway after "Create Offer".
2. The properties panel shows:
* Gateway type
* Default flow
* Outgoing conditions
1. Click on the "Create Offer" script task.
2. Examine the script content calculating salary and bonus:
```java theme={null}
// Example script from "Create Offer" task
if (experience <= 5) {
salary = 30000;
category = "Software Engineer";
} else if (experience <= 10) {
salary = 40000;
category = "Senior Software Engineer";
} else {
salary = 50000;
category = "Software Architect";
}
bonus = skills.split(",").length * 150;
kcontext.setVariable("category", category);
kcontext.setVariable("salary", salary);
kcontext.setVariable("bonus", bonus);
```
## Modifying the Process
Let's make some modifications to understand the editor better.
### Adding a New Task
1. From the left palette, drag a "User Task" onto the modeller after "Create Offer".
2. Connect it to the flow:
* Click on the sequence flow between "Create Offer" and "HR Interview".
* Delete it by pressing Delete/Backspace.
* Use the arrow tool to connect "Create Offer" to your new task.
* Connect your new task to "HR Interview".
3. Configure the task:
* Name it "Manager Approval".
* Set the actor to "manager".
* Add data inputs/outputs as needed.
### Adding a Condition to a Gateway
1. Click on the exclusive gateway after "New Hiring".
2. In the properties panel, select a sequence flow to edit.
3. Add a condition like: `return experience >= 2;`
### Adding a Service Task
1. Drag a "Service Task" from the palette to the modeller.
2. Configure it with:
* **Name**: "Background Check"
* **Implementation**: Select "Java" implementation type
* **Class name**: `org.acme.hiring.BackgroundCheckService`
* **Method**: `performCheck`
## Process Variables and Data Flow
The hiring process uses several variables:
* **Input Variables**:
* `candidate` (String): Candidate's name
* `experience` (Integer): Years of experience
* `skills` (String): Comma-separated list of skills
* **Process Variables**:
* `hr_approval` (Boolean): HR interview approval
* `it_approval` (Boolean): IT interview approval
* **Output Variables**:
* `category` (String): Job category based on experience
* `salary` (Integer): Base salary calculation
* `bonus` (Integer): Bonus calculation based on skills
### Data Mapping Example
Let's examine how data is passed between tasks:
* **HR Interview Task**:
* Inputs:
* `candidate`: Candidate name
* `approve`: Current approval status (hr\_approval)
* `category`: Job category
* `baseSalary`: Salary amount
* `bonus`: Bonus amount
* Outputs:
* `approve`: Updated approval status (hr\_approval)
* `category`: Potentially modified category
* `baseSalary`: Potentially modified salary
* `bonus`: Potentially modified bonus
## Process Execution and Testing
### Testing Your BPMN Process
1. Click the "Deploy" button in the top-right corner.
2. Select the "Deploy to Dev" option.
3. Once deployed, click "Start Process".
4. Enter test data:
* **Candidate**: "John Doe"
* **Experience**: 8
* **Skills**: "Java,Spring,Drools"
5. Click "Start" to begin the process instance.
6. Navigate to the "Instances" tab to see the running process.
7. Complete user tasks as they appear in the "Tasks" tab.
### Monitoring Process Execution
1. In the "Instances" tab, click on a running instance.
2. View the process diagram with the highlighted current state.
3. Examine the "Variables" tab to see current values.
4. Check the "Logs" tab for execution history.
## Deployment Options
### Local Deployment
For local testing with the Dev Deployment option:
1. Click "Deploy" in the top menu.
2. Select "Deploy to Dev".
3. Access the runtime at [http://localhost:9090/management](http://localhost:9090/management).
### Kubernetes Deployment
For deploying to Kubernetes:
1. Set up Kubernetes configuration:
* Click on the Profile icon (👤).
* Select the "Kubernetes" tab and add your cluster.
2. Deploy to Kubernetes:
* Click "Deploy" in the top menu.
* Select your Kubernetes environment.
* Configure deployment options (replicas, resources).
* Click "Deploy".
## Integrating BPMN with DMN
The hiring process could be enhanced with decision models:
1. Create a DMN model for determining eligibility:
* Click "New File" > "Decision".
* Name it "CandidateEligibility".
* Create a decision table with inputs for experience and skills.
* Connect it to your BPMN model.
2. Integrate the DMN with your BPMN:
* Replace the exclusive gateway condition with a business rule task.
* Configure the task to call your DMN model.
* Map process variables to DMN inputs/outputs.
## Java Application Integration
### Setting Up a Java Project
```xml theme={null}
org.kie
kie-api
10.0.0
```
### Invoking the Process from Java
```java theme={null}
import org.kie.kogito.process.Process;
import org.kie.kogito.process.ProcessInstance;
@Inject
Process hiringProcess;
public void startHiringProcess(String candidate, int experience, String skills) {
HiringModel model = HiringModel.builder()
.candidate(candidate)
.experience(experience)
.skills(skills)
.build();
ProcessInstance instance = hiringProcess.createInstance(model);
instance.start();
}
```
## Next Steps
Now that you're familiar with BPMN in Aletyx Playground, here are some recommended
next steps:
* **Create Custom Service Tasks**: Develop Java components for integration.
* **Use Process Variables**: Define complex data structures.
* **Add Error Handling**: Implement boundary error events and compensation.
* **Create Multi-Instance Tasks**: Handle collections of data in parallel.
* **Build End-to-End Applications**: Combine BPMN with DMN and Java services.
Orchestrate long-running business processes.
Build and test DMN decision models in the browser.
How decisions are authored, tested, and governed.
## Additional Resources
* [BPMN 2.0 Specification](https://www.omg.org/spec/BPMN/2.0/)
* [Aletyx Documentation](https://docs.aletyx.ai/)
* [KIE Apache Projects](https://kie.apache.org/)
* [Drools Documentation](https://www.drools.org/learn/documentation.html)
* [jBPM Documentation](https://www.jbpm.org/learn/documentation.html)