> ## Documentation Index
> Fetch the complete documentation index at: https://aletyx.ai/docs/llms.txt
> Use this file to discover all available pages before exploring further.
# Setup
> Subscribe to the Aletyx AI Assistant, create your API key, and connect it to the Playground - step by step.
This guide walks you through setting up the Aletyx AI Assistant in the [Aletyx Playground](/docs/components/playground/overview): subscribing, creating your API key, and connecting it to the editor. By the end, you'll be chatting with the assistant about a decision model.
**What you need**
* An email address and a payment card. The subscription starts with a **14-day free trial** - your card is saved but not charged today, and you can cancel anytime before the trial ends without being charged.
* A browser open at [playground.aletyx.ai](https://playground.aletyx.ai).
## Setup
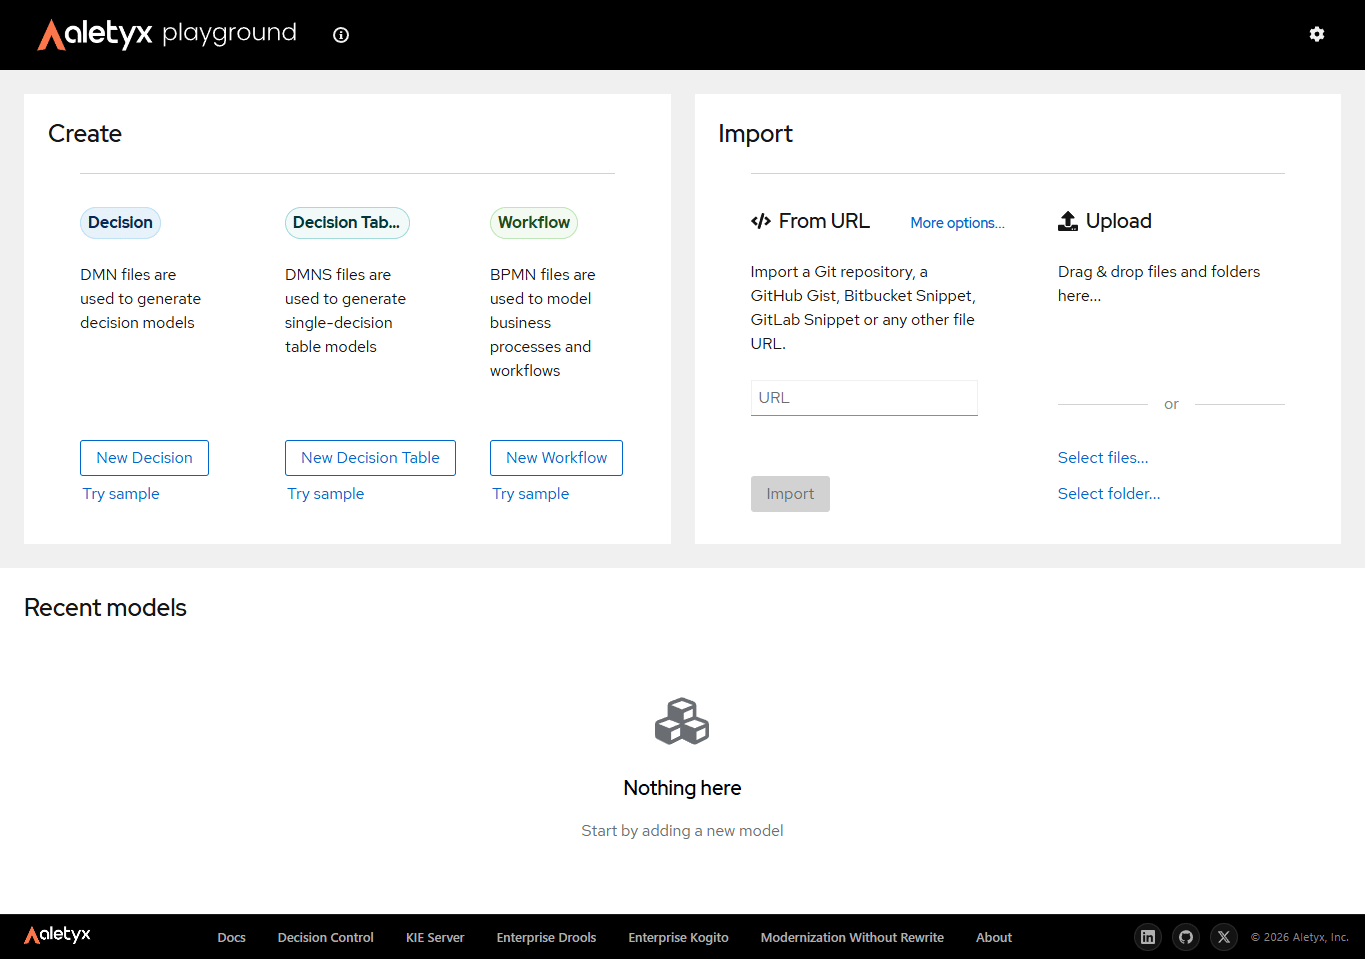
Go to [playground.aletyx.ai](https://playground.aletyx.ai). From the home screen you can create a new **Decision**, **Decision Table**, or **Workflow**, import existing files, or open a ready-made example with **Try sample**. To follow along, click **Try sample** under **Decision**.
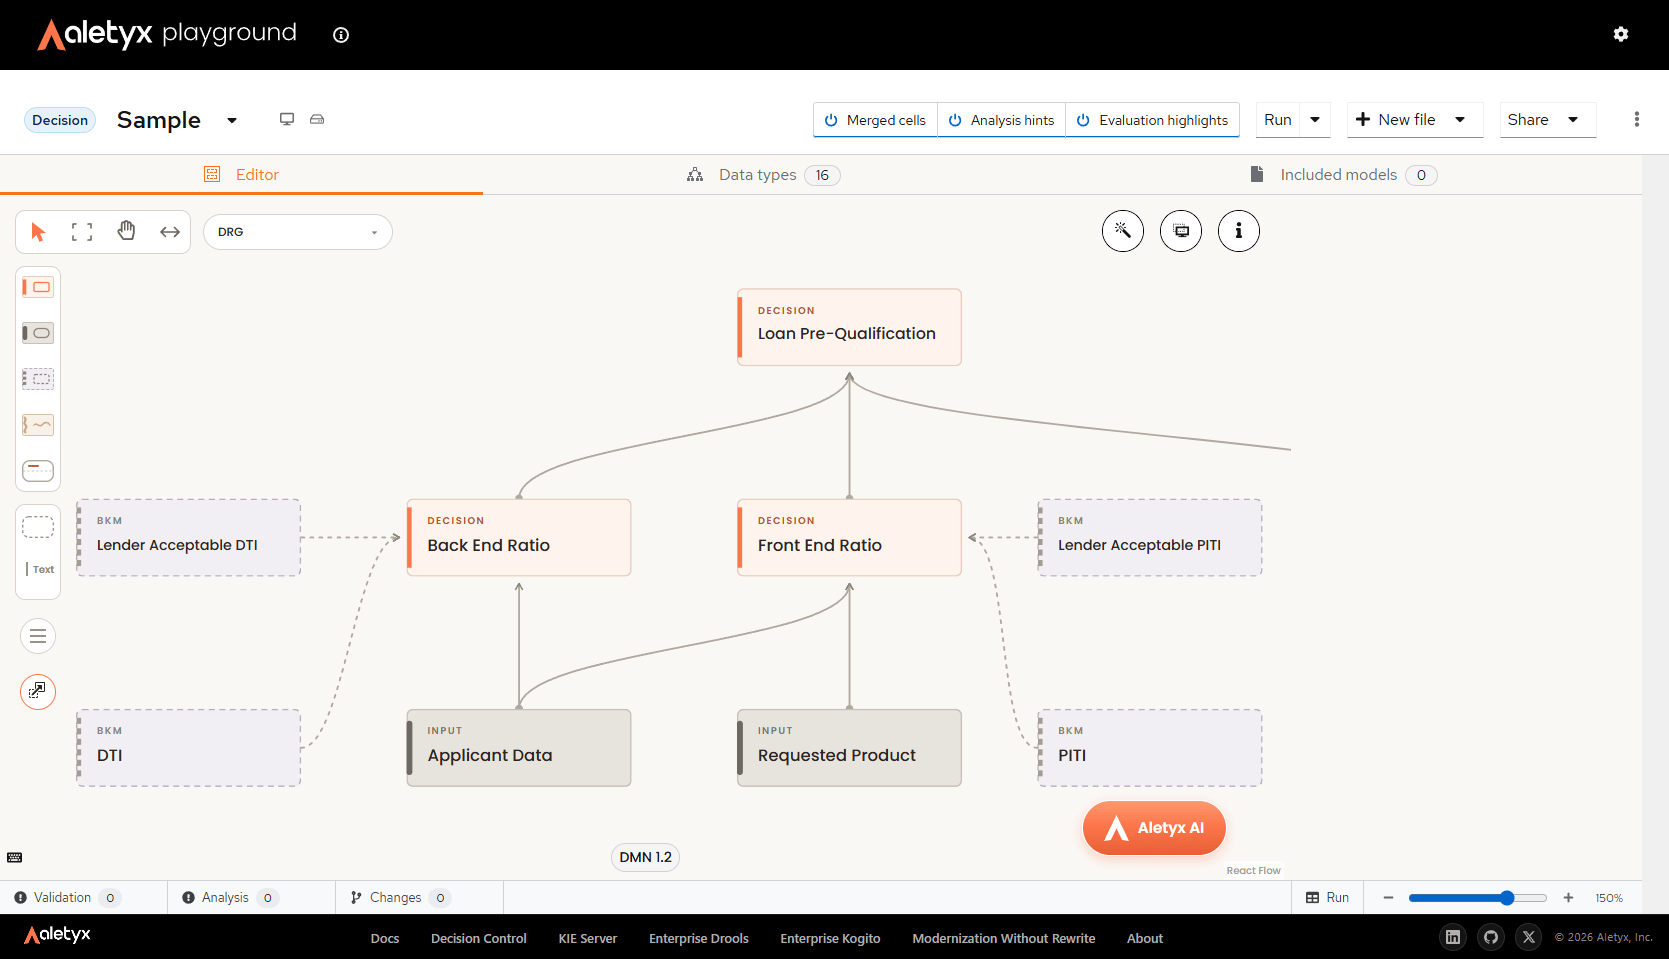
 The sample opens a **Loan Pre-Qualification** DMN model in the decision editor. Notice the floating **Aletyx AI** button at the bottom-right of the canvas - that's where the assistant lives.
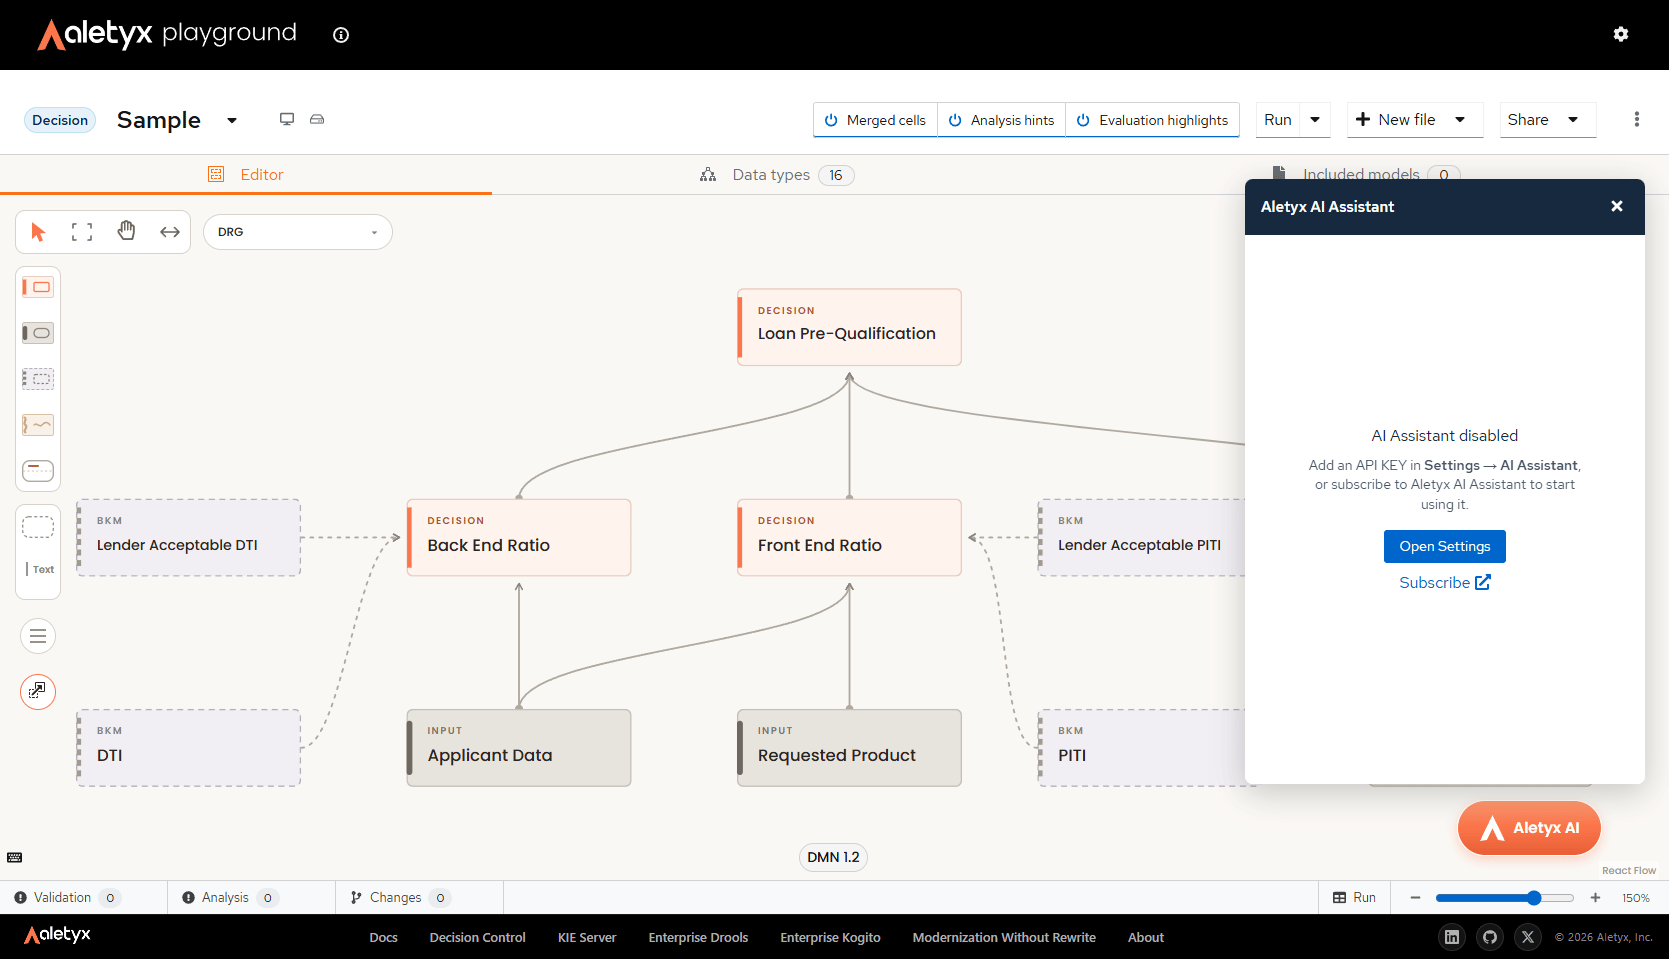
 Click the **Aletyx AI** button. The assistant panel opens and shows **AI Assistant disabled**: you can add an API key in **Settings → AI Assistant**, or subscribe first. Since you don't have a key yet, click **Subscribe**.
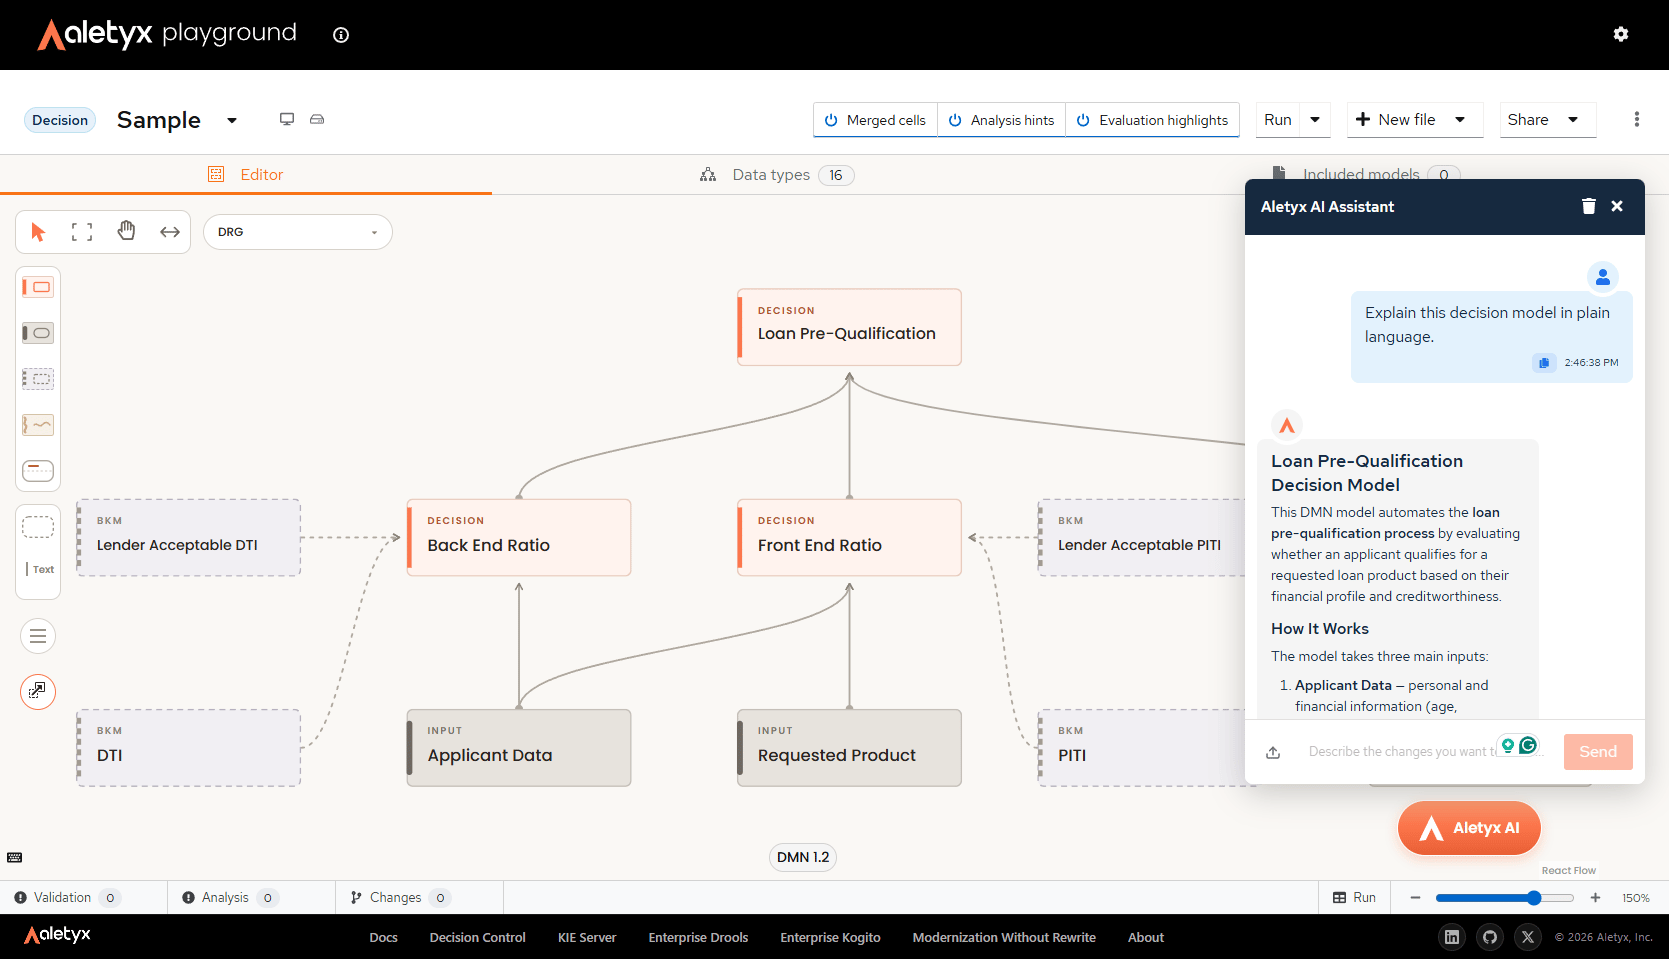
 The **Loan Pre-Qualification** sample you're looking at is a DMN model that automates loan pre-qualification: it evaluates whether an applicant qualifies for a requested loan product based on their financial profile and creditworthiness. It takes three inputs - **Applicant Data** (personal and financial information such as income, expenses, and debts), **Requested Product** (loan type, amount, rate, and term), and the applicant's FICO **Credit Score**.
From those inputs it works through three intermediate decisions: a **Credit Score Rating** that maps the FICO score to a category from Excellent to Bad, a **Front End Ratio** that checks housing affordability (monthly PITI payment vs. income, acceptable up to 28%), and a **Back End Ratio** that checks the overall debt burden (debt-to-income, acceptable up to 36%). A final decision table combines them - a Poor or Bad credit rating or an insufficient ratio means **Not Qualified** - and outputs the qualification status along with a reason explaining the decision.
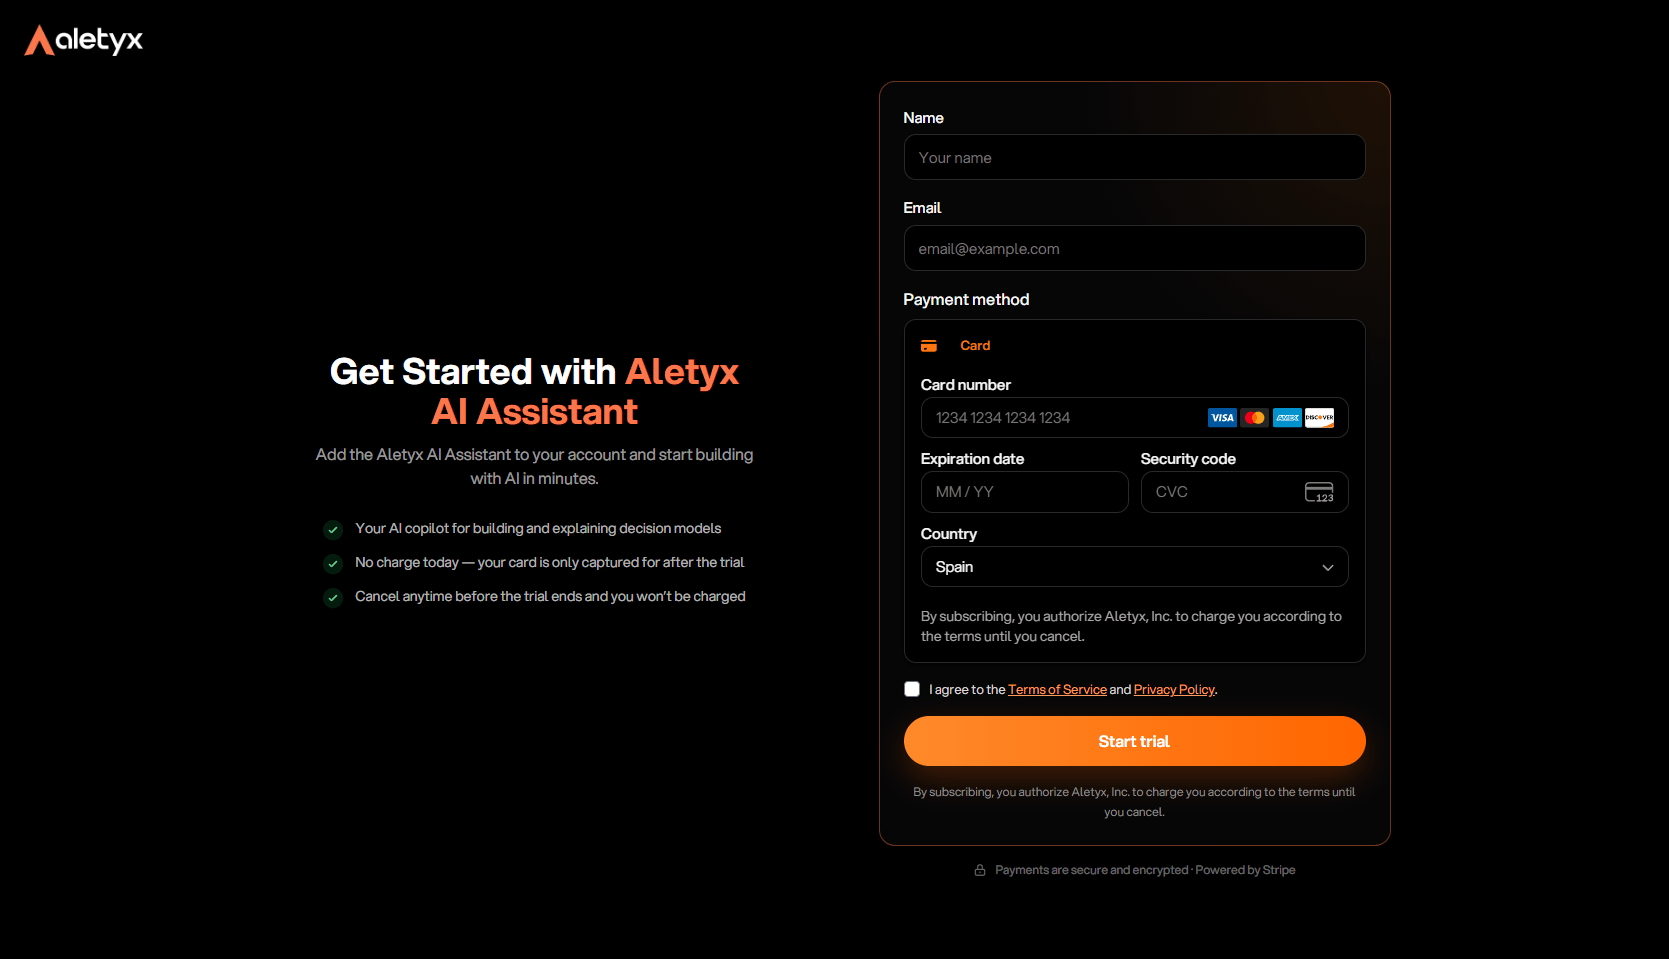
The **Get Started with Aletyx AI Assistant** checkout opens at [my.aletyx.ai/ai-assistant](https://my.aletyx.ai/ai-assistant). Enter your **name**, **email**, and **payment method**, pick your **country**, tick **I agree to the Terms of Service and Privacy Policy**, and click **Start trial**. There's no charge today - the card is only captured for after the trial.
The **Loan Pre-Qualification** sample you're looking at is a DMN model that automates loan pre-qualification: it evaluates whether an applicant qualifies for a requested loan product based on their financial profile and creditworthiness. It takes three inputs - **Applicant Data** (personal and financial information such as income, expenses, and debts), **Requested Product** (loan type, amount, rate, and term), and the applicant's FICO **Credit Score**.
From those inputs it works through three intermediate decisions: a **Credit Score Rating** that maps the FICO score to a category from Excellent to Bad, a **Front End Ratio** that checks housing affordability (monthly PITI payment vs. income, acceptable up to 28%), and a **Back End Ratio** that checks the overall debt burden (debt-to-income, acceptable up to 36%). A final decision table combines them - a Poor or Bad credit rating or an insufficient ratio means **Not Qualified** - and outputs the qualification status along with a reason explaining the decision.
The **Get Started with Aletyx AI Assistant** checkout opens at [my.aletyx.ai/ai-assistant](https://my.aletyx.ai/ai-assistant). Enter your **name**, **email**, and **payment method**, pick your **country**, tick **I agree to the Terms of Service and Privacy Policy**, and click **Start trial**. There's no charge today - the card is only captured for after the trial.
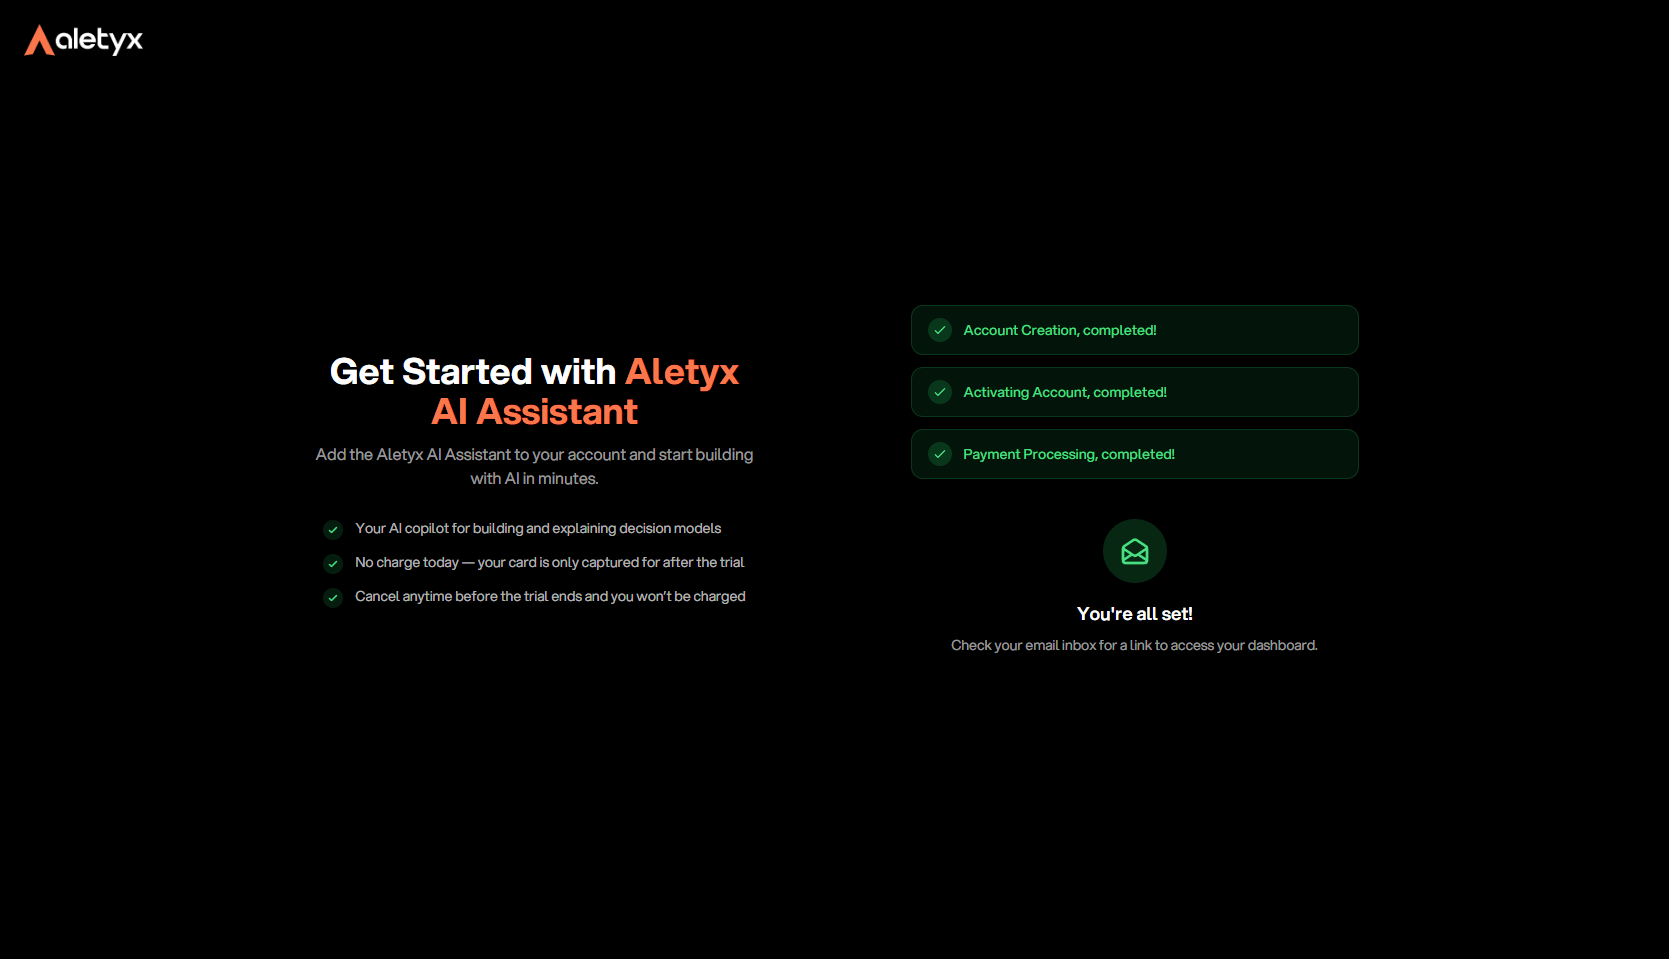
 The checkout confirms each stage as it finishes: **Account Creation**, **Activating Account**, and **Payment Processing**. When you see **You're all set!**, check your email inbox for a link to access your dashboard.
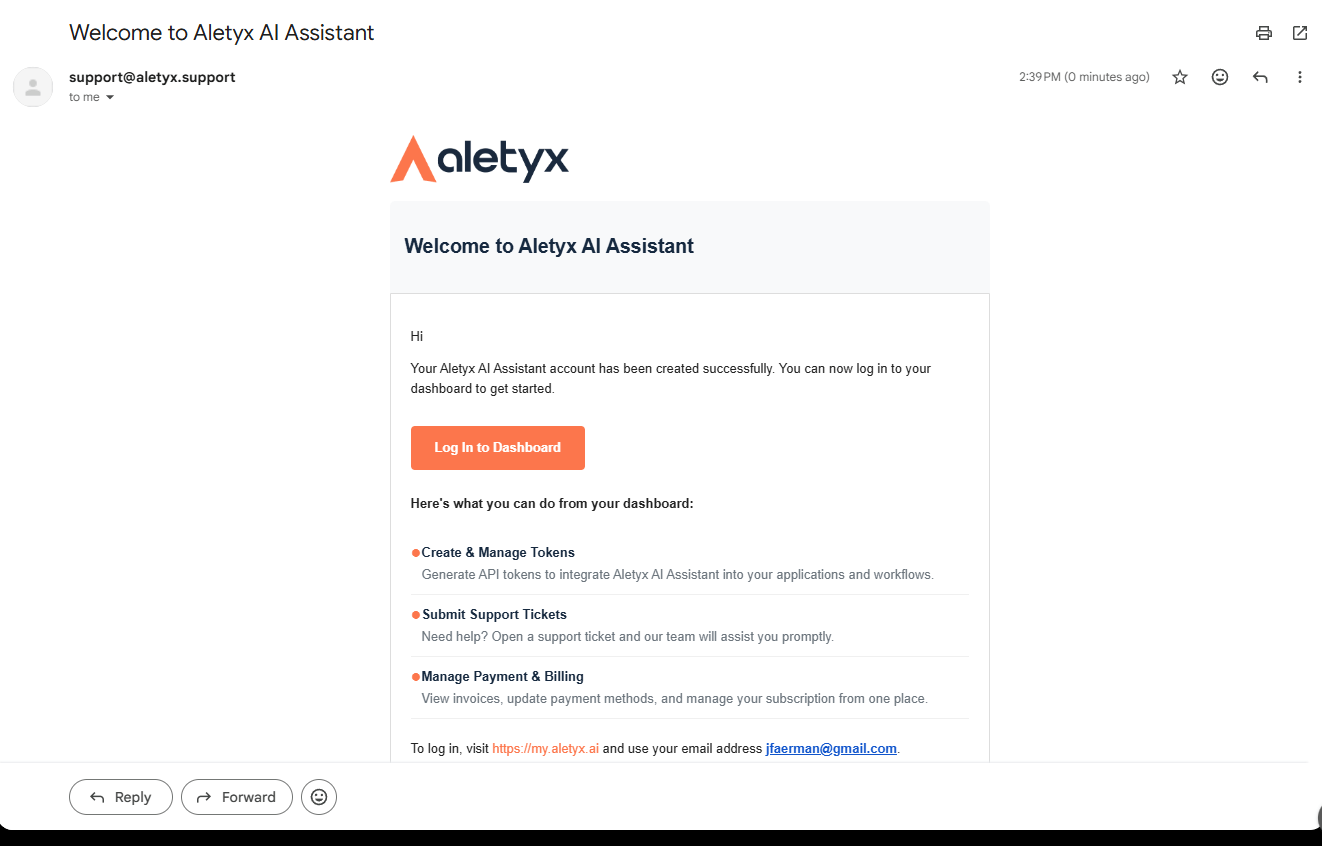
 You'll receive a **Welcome to Aletyx AI Assistant** email confirming your account was created. Click **Log In to Dashboard** to open **My Aletyx**.
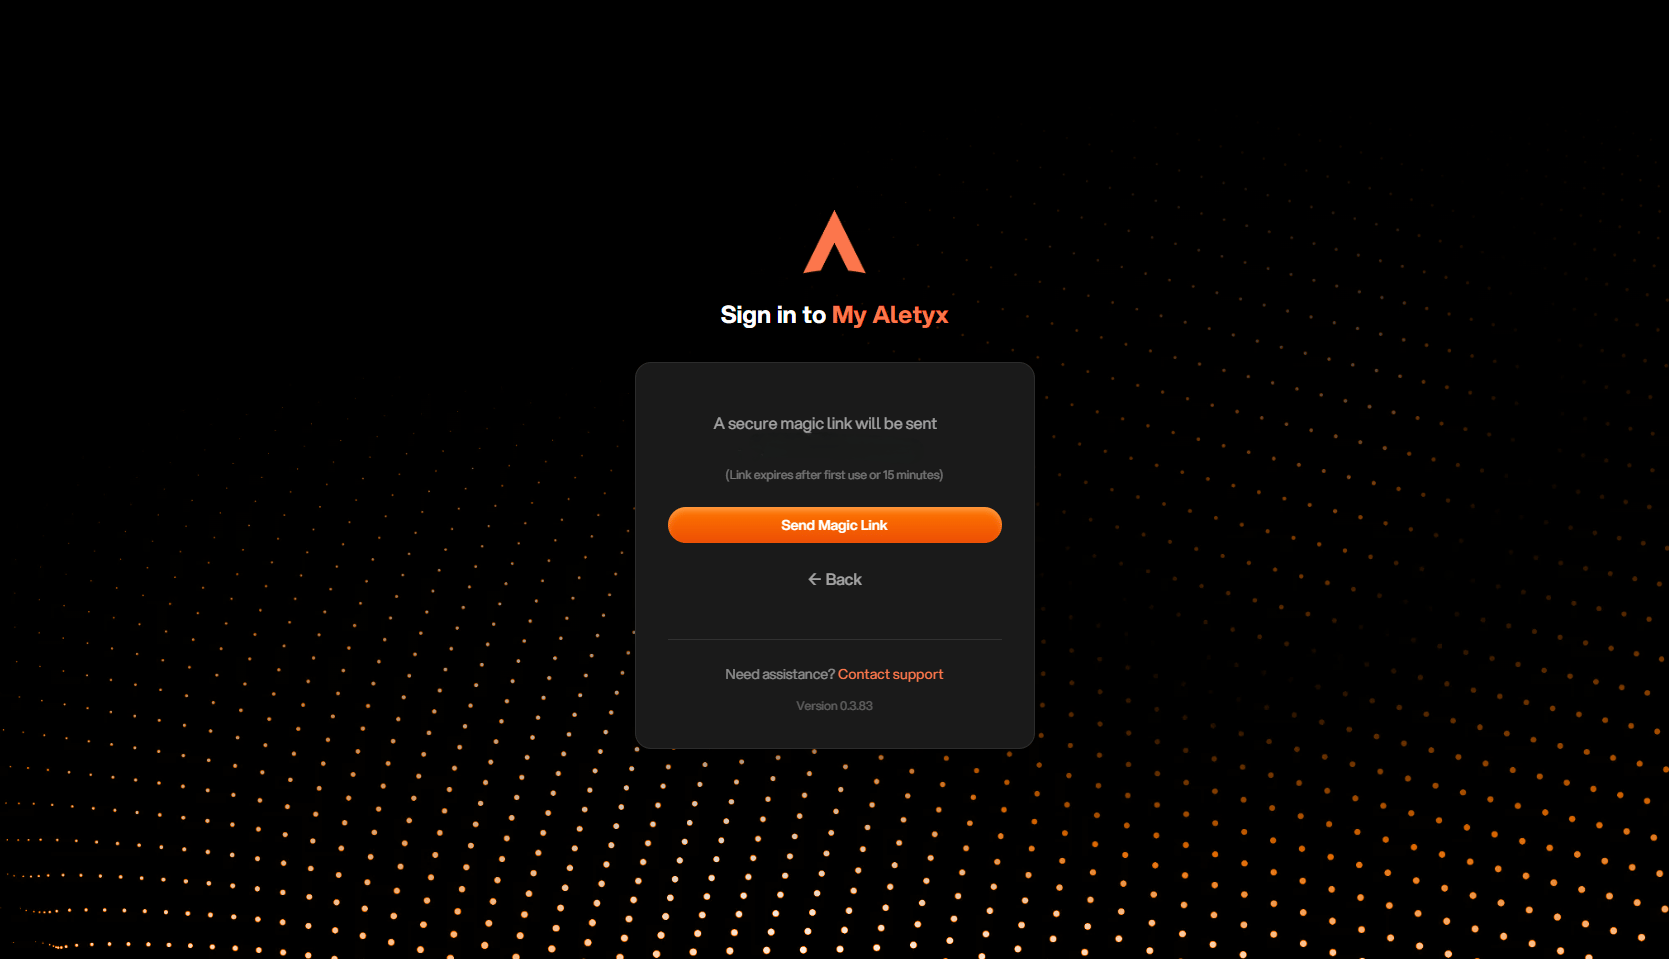
 My Aletyx signs you in with a **magic link** - no password needed. Click **Send Magic Link**, then open the link from your inbox. The link expires after first use or 15 minutes.
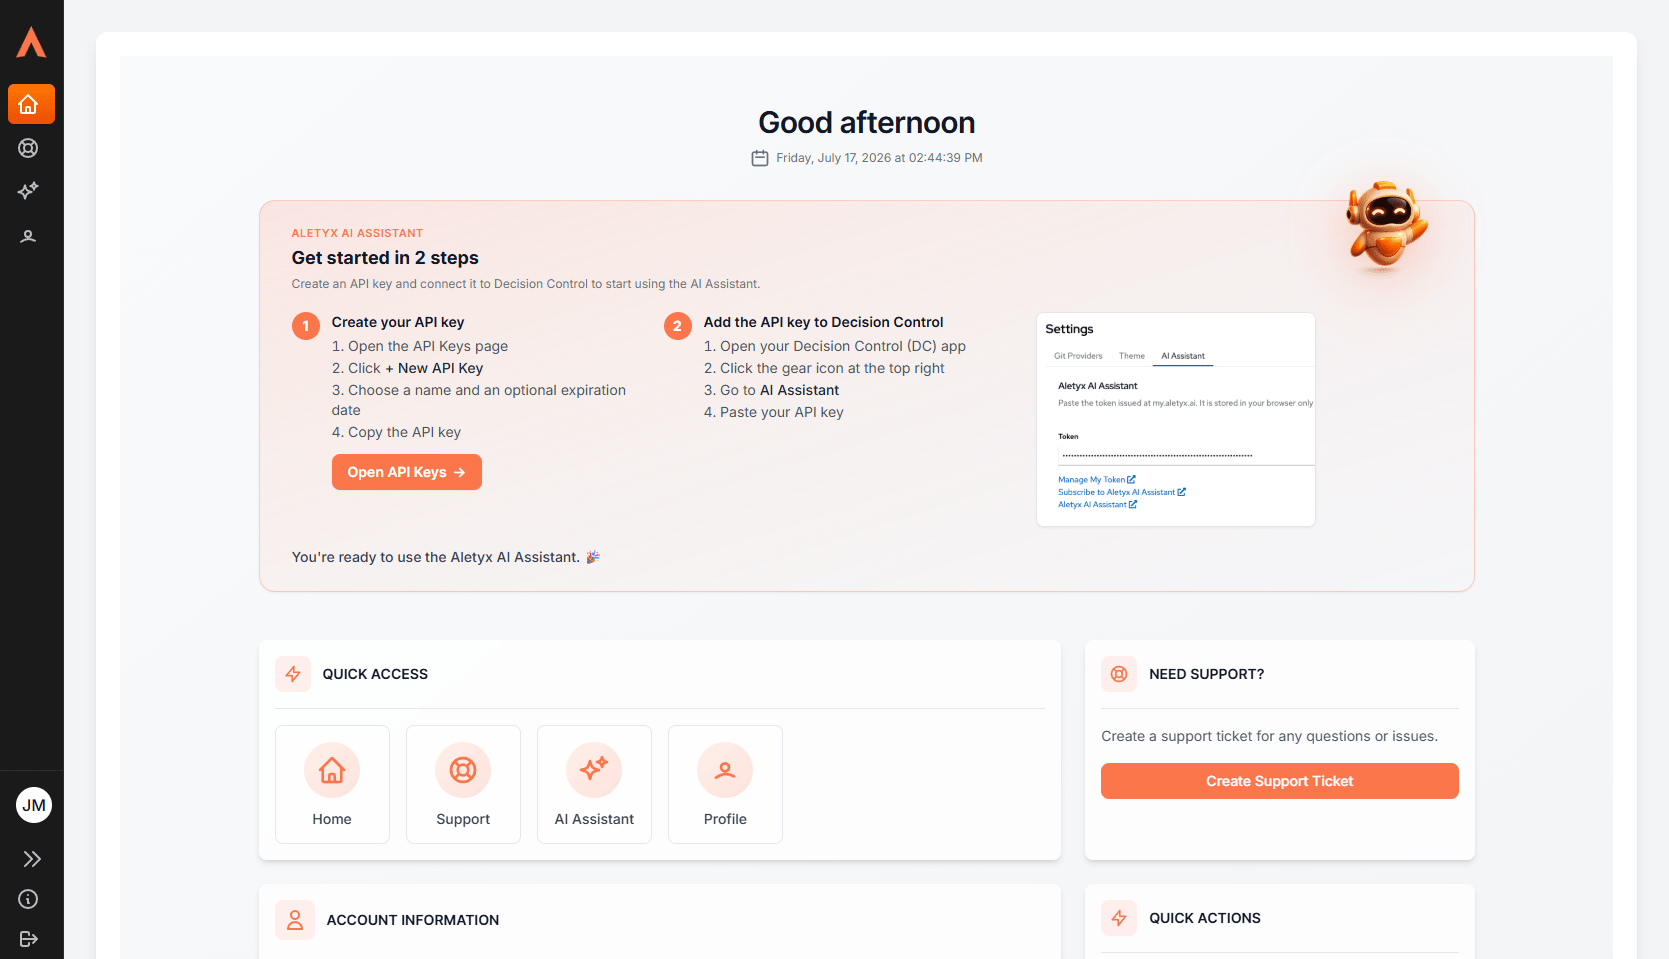
 Your **My Aletyx** dashboard greets you with **Get started in 2 steps**: create an API key, then add it to the editor. Click **Open API Keys** to jump straight to the API Keys page.
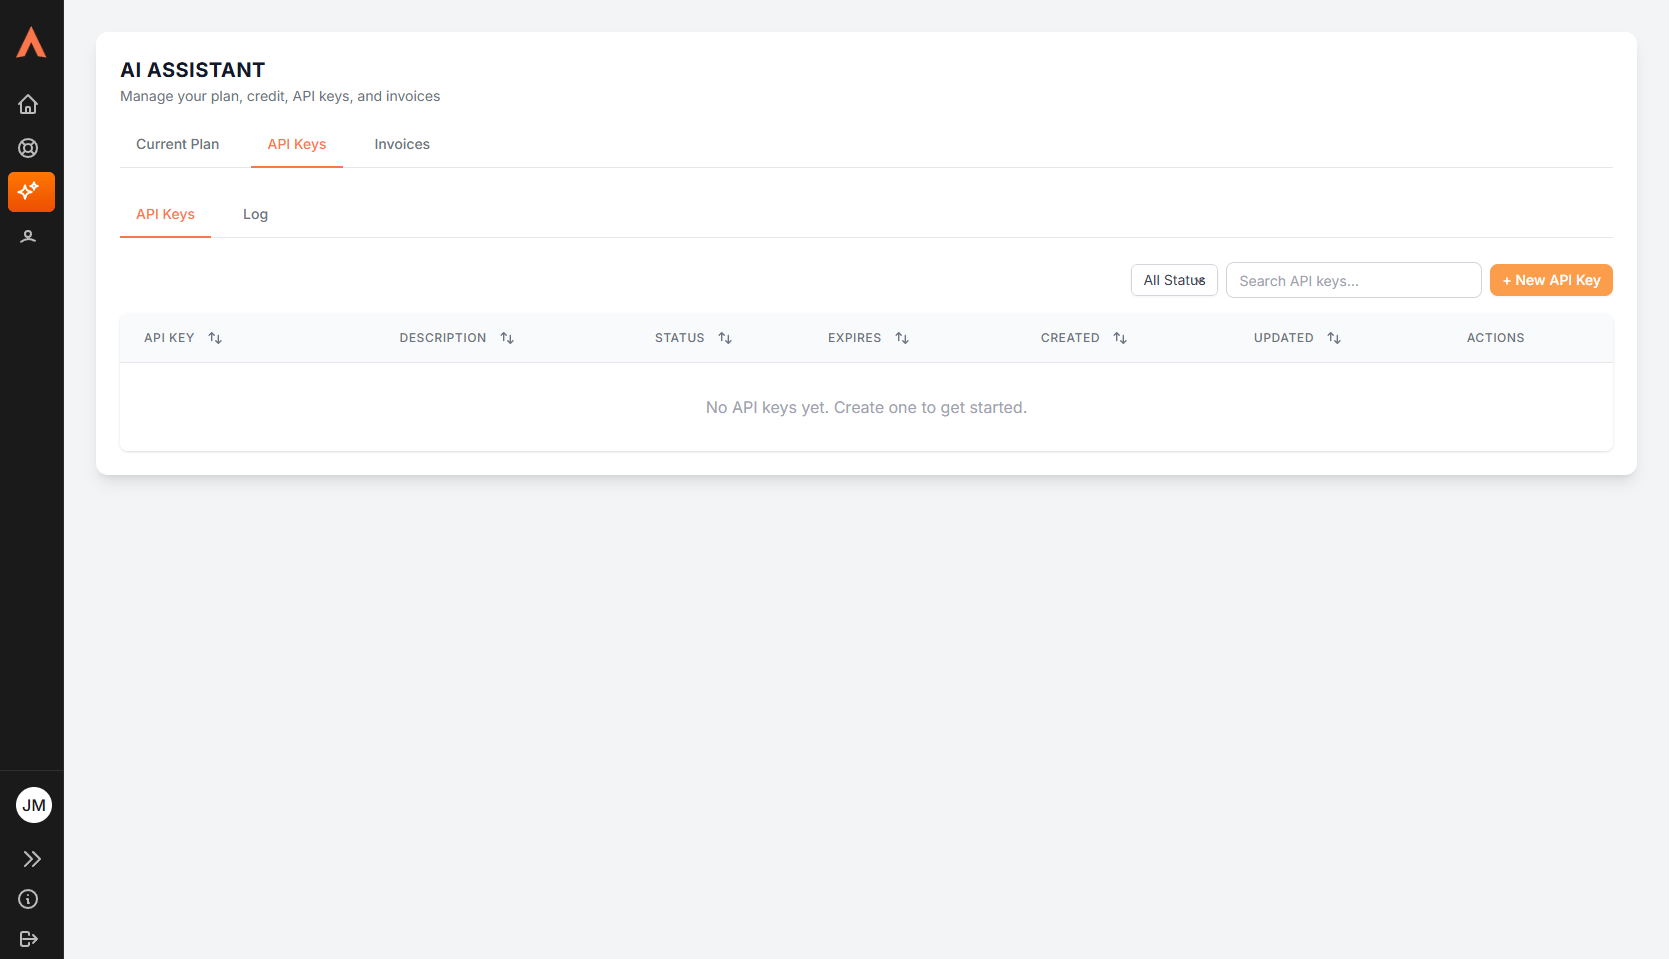
 The **AI Assistant** section is where you manage your plan, credit, API keys, and invoices. On the **API Keys** tab, click **+ New API Key**.
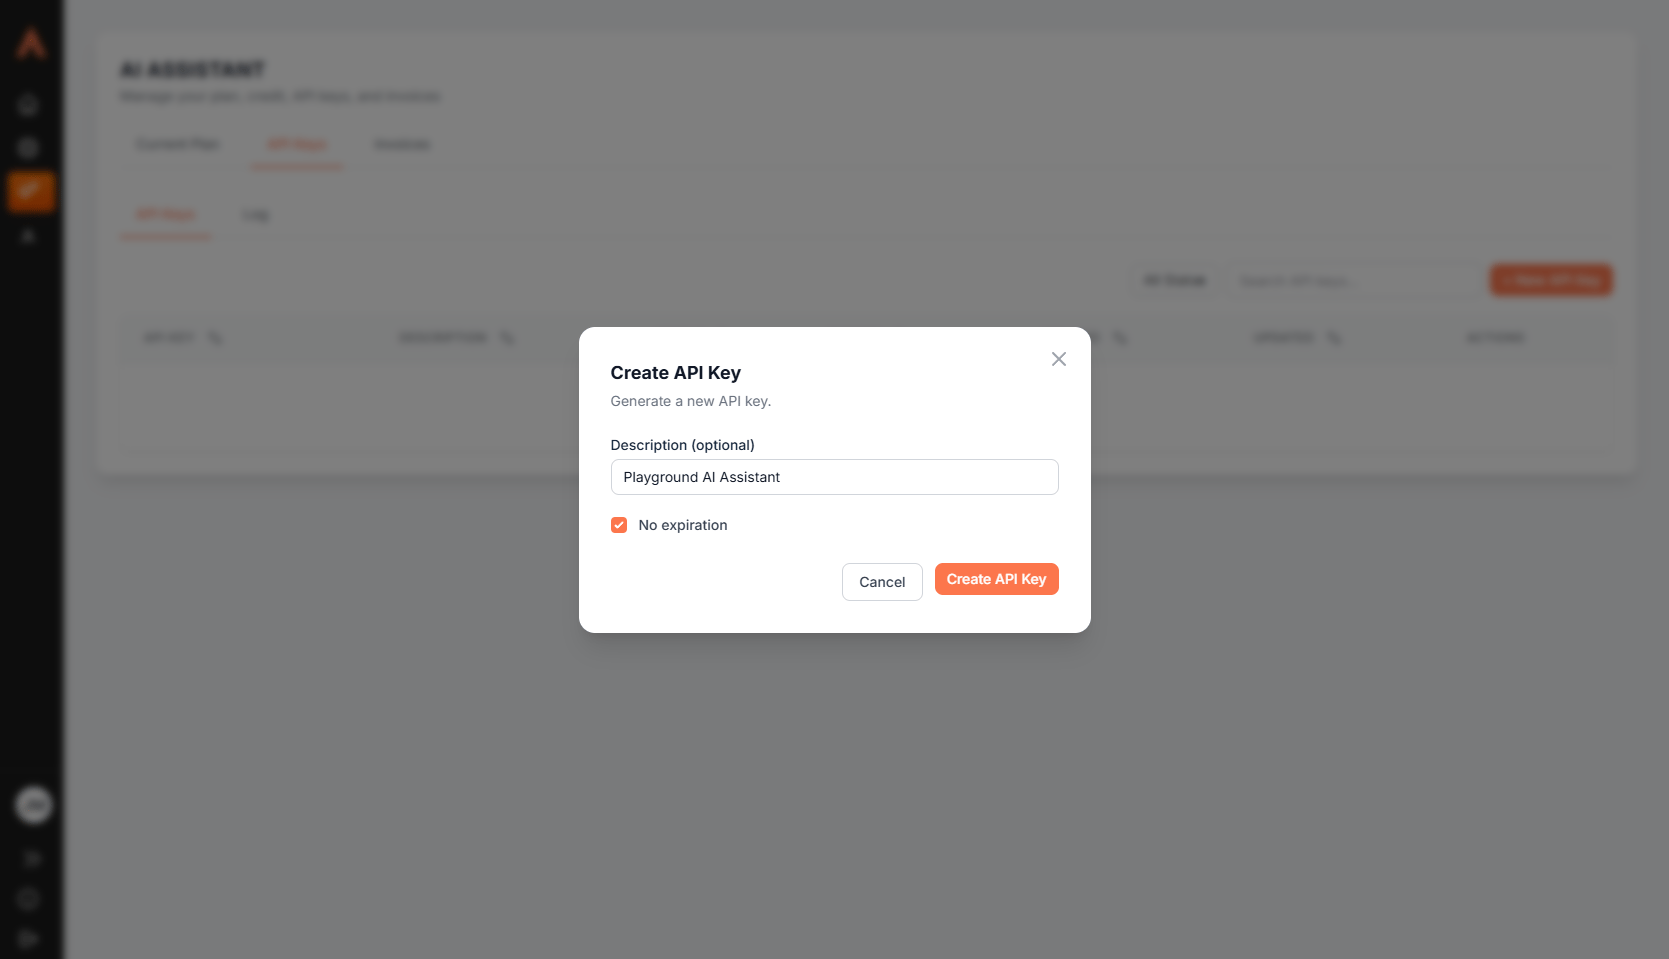
 In the **Create API Key** dialog, give the key an optional **description** (for example, "Playground AI Assistant") and choose whether it expires - **No expiration** is fine for personal use. Click **Create API Key**.
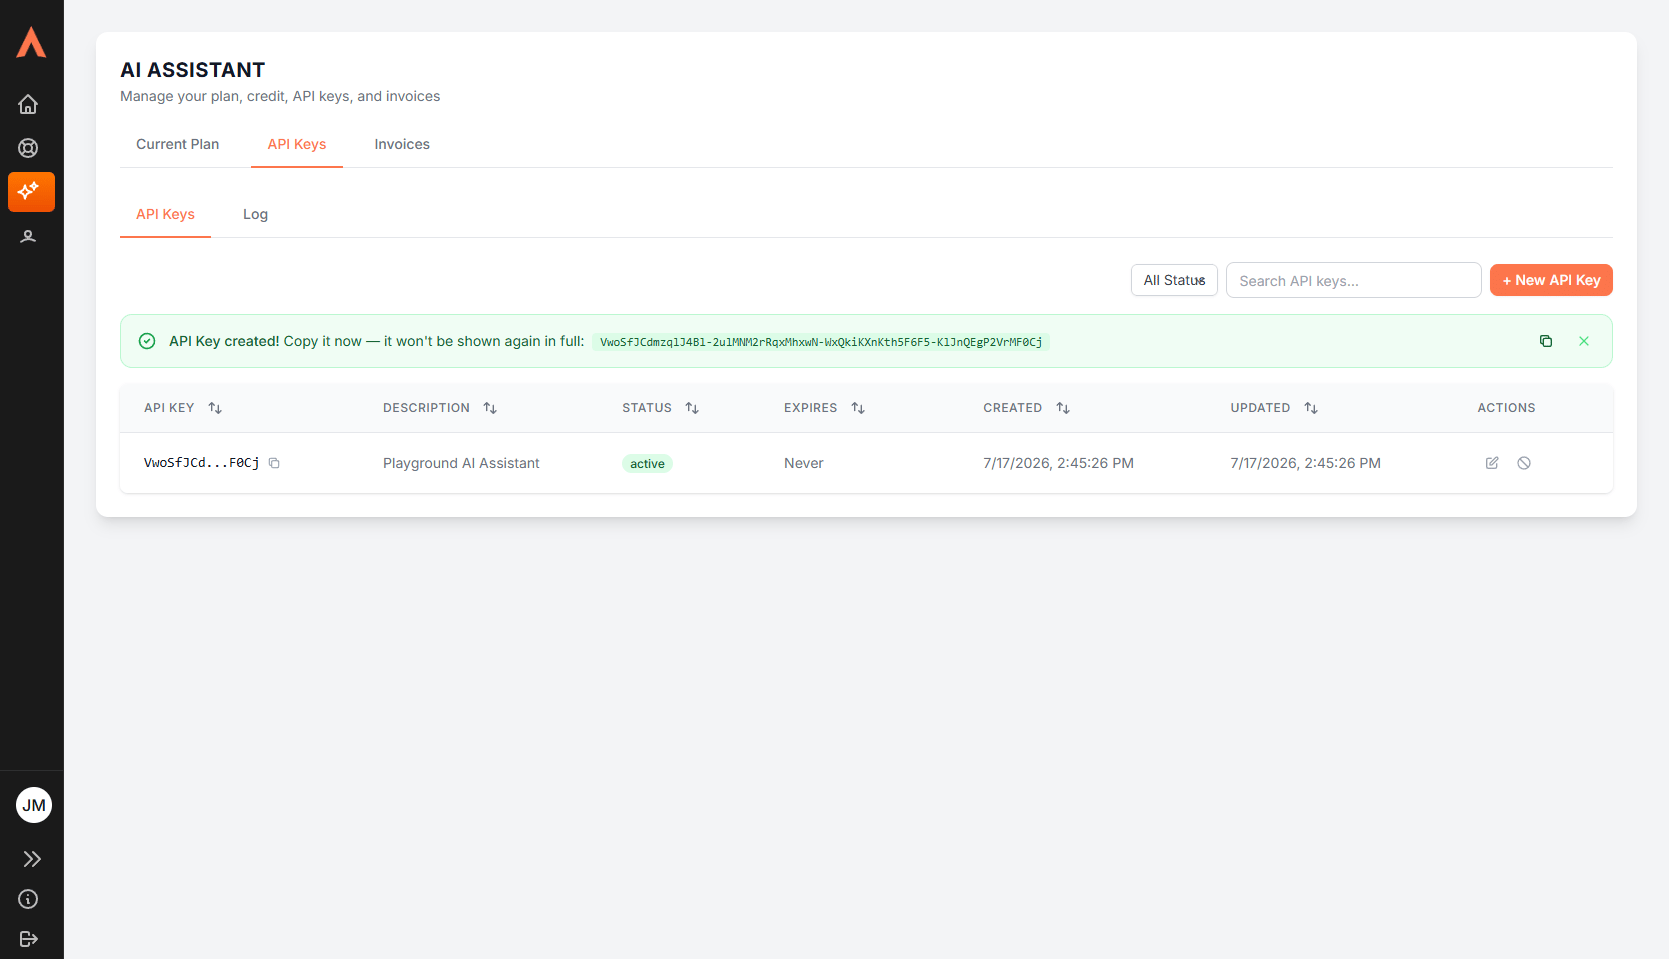
 The new key appears with an **API Key created!** banner. Copy it now - it won't be shown again in full. If you lose it, revoke it from this list and create a new one.
 **Keep your API key secret**
The API key authenticates **you** individually - anyone who has it can use the assistant on your account and spend your credit. Don't save it unprotected in plaintext (notes, code, shared documents, or chat). If you need to store it, use a password manager or secrets vault, and if a key is ever exposed, revoke it from the API Keys list and create a new one.
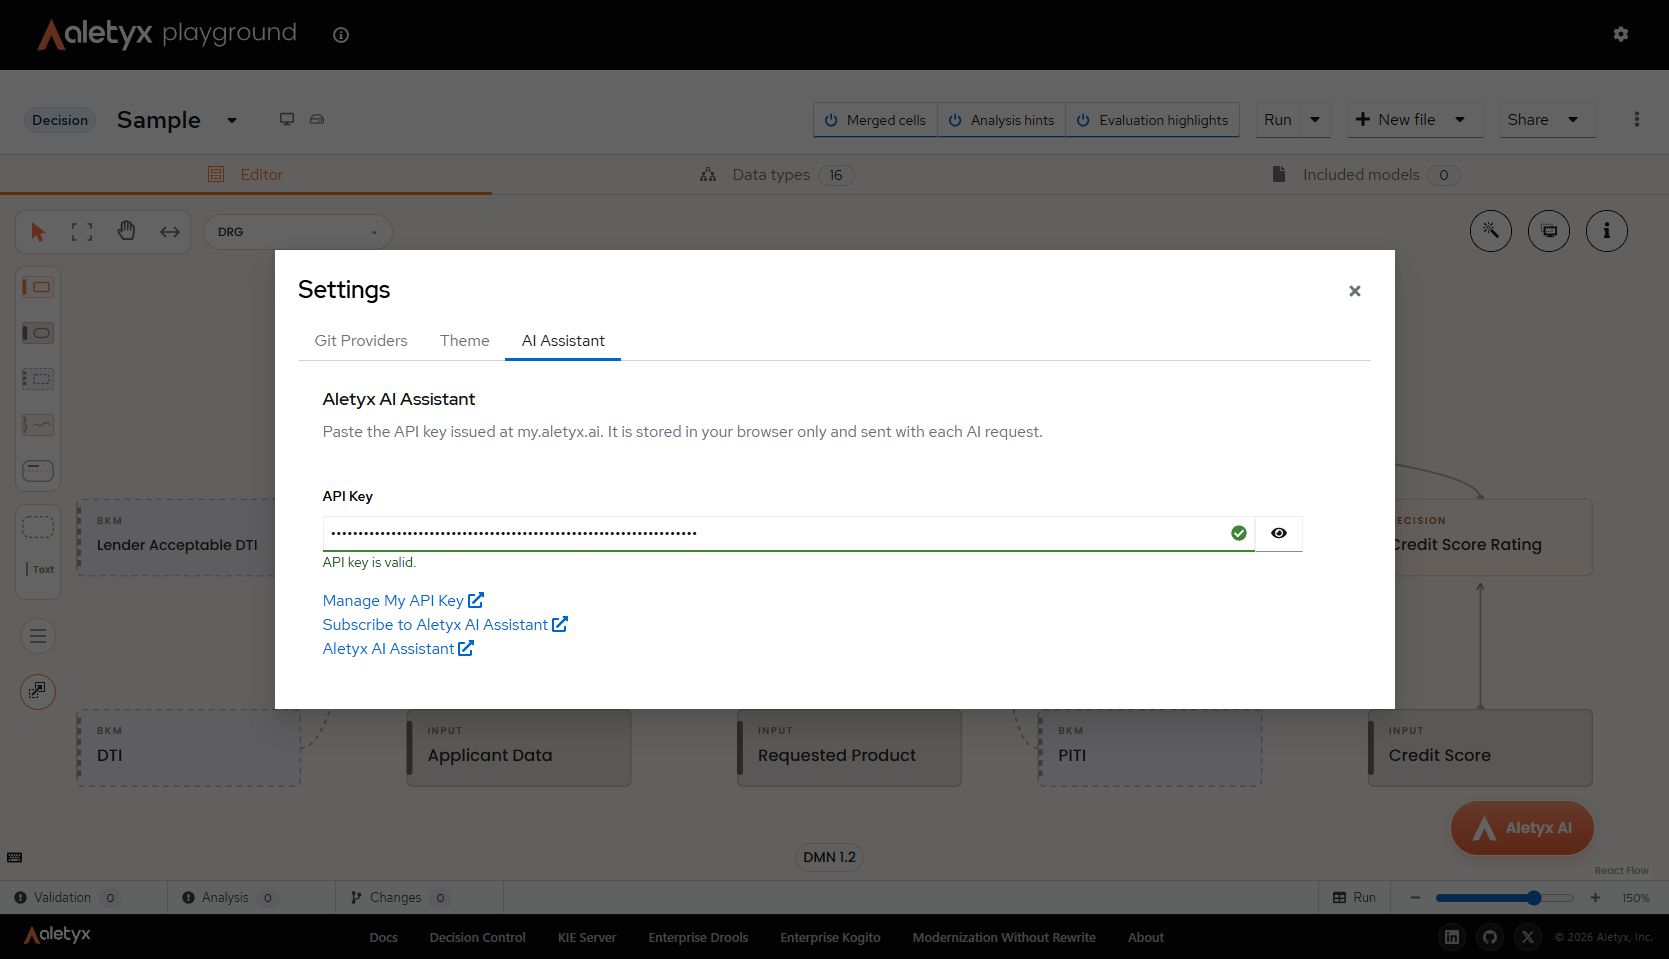
Back in the Playground, click the **gear** icon (top-right) and open the **AI Assistant** tab in **Settings**. Paste the key into the **API Key** field - it's validated automatically, and the status shows **API key is valid**. The key is stored in your browser only and sent with each AI request.
**Keep your API key secret**
The API key authenticates **you** individually - anyone who has it can use the assistant on your account and spend your credit. Don't save it unprotected in plaintext (notes, code, shared documents, or chat). If you need to store it, use a password manager or secrets vault, and if a key is ever exposed, revoke it from the API Keys list and create a new one.
Back in the Playground, click the **gear** icon (top-right) and open the **AI Assistant** tab in **Settings**. Paste the key into the **API Key** field - it's validated automatically, and the status shows **API key is valid**. The key is stored in your browser only and sent with each AI request.
 Close Settings and click the **Aletyx AI** button again. The assistant is now active - ask it something about your model, like *"Explain this decision model in plain language,"* or describe a change you want and review its suggestion.
 **Your API key stays in your browser**
The key is saved in your browser on this computer only - it isn't shared with other people or devices. If you switch computers, paste it again. To turn the assistant off on a computer, clear the **API Key** field in Settings.
## Next steps
* Ask the assistant to build or change a model by describing it - naming the fields, values, and conditions you want gives much better results than a vague request.
* Manage your plan, credit, and invoices anytime at [my.aletyx.ai](https://my.aletyx.ai).
## References
* [Aletyx Playground](/docs/components/playground/overview) - the free online editor used throughout this guide
* [Playground DMN tutorial](/docs/components/playground/dmn-tutorial) - build your first decision model in the Playground
* [DMN concepts](/docs/architecture/decisions/dmn/overview) - what DMN is and how decision models are structured
* [DMN reference](/docs/reference/dmn/overview) - FEEL functions, reserved words, and the SELECT reference
* [Drools](/docs/drools/overview) - the rule engine that evaluates your decision models
* [Aletyx AI Assistant product page](https://aletyx.ai/ai-assistant) - plans and product details
**Your API key stays in your browser**
The key is saved in your browser on this computer only - it isn't shared with other people or devices. If you switch computers, paste it again. To turn the assistant off on a computer, clear the **API Key** field in Settings.
## Next steps
* Ask the assistant to build or change a model by describing it - naming the fields, values, and conditions you want gives much better results than a vague request.
* Manage your plan, credit, and invoices anytime at [my.aletyx.ai](https://my.aletyx.ai).
## References
* [Aletyx Playground](/docs/components/playground/overview) - the free online editor used throughout this guide
* [Playground DMN tutorial](/docs/components/playground/dmn-tutorial) - build your first decision model in the Playground
* [DMN concepts](/docs/architecture/decisions/dmn/overview) - what DMN is and how decision models are structured
* [DMN reference](/docs/reference/dmn/overview) - FEEL functions, reserved words, and the SELECT reference
* [Drools](/docs/drools/overview) - the rule engine that evaluates your decision models
* [Aletyx AI Assistant product page](https://aletyx.ai/ai-assistant) - plans and product details